Monday, 31 December 2018

Whats the intent?


Galen Gallimore runs a great blog over at http://ocalicreek.blogspot.com/. Recently, Galen made a thoughtful post titled "Whats the intent?". In turn, his post had been inspired by a post on Mike Cougill's blog at http://www.ostpubs.com/whats-the-intent/. Their posts explored the rationale behind what we are trying to achieve with our model railroads. Galen issued a challenge for other modelers to share their thoughts about the intent behind their layouts so this is some of my thinking for my Thoroughfare Gap Railroad.

My decision to model the 1890's was very intentional. From the outset, I intended for my railroad to be a 'window into the past', with a distinct focus on the connection that railroads brought to communities. 

Before the turn of the century, your own two feet or a horse were the most common mode of transport and travelling 12 miles, or 20 kilometres by wagon was a big day. When the railroads arrived they more readily connected communities across the country. Journeys now took days rather than weeks or months and people and goods traveled more freely than ever before. Railroads become vitally important in building local and national economies.

My layout attempts to build the sense of connection in three ways:

1. Point to point design 
The track is arranged like a real railroad in that the track starts in one locality (Erewhon) and ends in another (Teresaton). The layout has no continuous running. I took some time to come around to this idea as every layout I had built featured continuous running and it was hard to break with tradition. However, it opened up opportunities for operation and scenery building which further add to the sense of connection. 

2. Different scenery for different localities
The drier canyon contrasts with the green deciduous forest around Cass. This
gives a sense these places are quite different localities. 
Changing the type of scenery for each locality gives the impression the railroad covers vast distances. This was mentioned in my track plan post where I mentioned the influences of John Olsen's Mescal Lines and his colour mood technique.

I tried to place the transitions so scenes change in a logical way. The drier canyon changes to long grass land, to deciduous forests to towering redwood forests, to a snowy mountain pass. I have also made use of scenic barriers via ridges and trees to create separate scenes. 
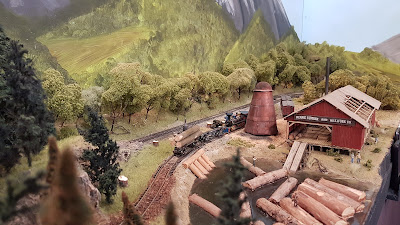
The scenic variety can give the sense the railroad covers a vast distance.

3. Scale people
A railroad does not just connect localities or industries, it connects people. People need to travel from place to place and send and receive goods. In the 1890s, railroads were a key part of life and a larger portion of the population would interact directly with the railroad, either via passenger trains or sending and receiving the goods for their business, no matter how big or small.

My layout features many HO scale figures, possibly more than average. I’m very lucky that my father enjoys painting the figures and he is always generously finding new period figures to go on the layout. One day I’ll do a post focusing on his work.

On the Thoroughfare Gap Railroad, you will see passengers crowding the station platforms, waiting for the next train. The team tracks are bustling with workers and Teresaton’s main street is a hive of activity, the townsfolk shopping for the latest wares brought in over the rails from somewhere far away.

I feel the presence of the figures gives face for the railroads connection. The railroad isn’t just serving a set of industries; it is enable the people and their goods to travel to other places on the layout. 

A stagecoach prepares to leave Teresaton. Rail head towns became important hubs for those needing to travel further afield.
Compared to the train, stagecoaches were limited in capacity and more uncomfortable.

Overall my intent was to demonstrate the important role played by railroads in connecting communities during the 1890s. I tried to achieve this by making the trains travel in a point to point fashion through varied scenery and localities and making the people the railroad serves a principle modelling subject.

I’m interested to hear what the intent behind your model railroad is.  Leave me a comment with your thoughts or a link to your blog post. If you haven’t yet built your model railroad, what are you hoping to capture?

Sunday, 23 December 2018

Coaling tower for Erewhon

Erewhon is the fiddle yard and interchange with the outside world and because of the limited space on this section of the layout, there is not much room for structures. However, there is a two stall engine house, and turntable. I am still working on a small passenger station.

A couple of weeks ago I completed a coaling tower kit that I picked up on TradeMe for $25. It is an old model power kit which, like it says on the box, went together really nicely.


I didn't paint the kit, but did give it a dirty wash and dry brush with Humbrol paints. This gives the structure a suitable weathered look and the dry brushing brings out some of the details. I cut away most of the base and painted what remained with earth coloured craft paints. 


Because Erewhon is a snow scene, the structure needed a covering of snow. I used the woodland scenics soft flake snow and stuck it in place with a combination of PVA glue and hairspray. 

I made a space for it on the layout, sprinkled some more snow around and also spread some crushed up coal on the ground and over the tracks. I glued this all down with the tried and true method of 50:50 water/PVA glue; being sure to spray the materials with 'wet' water prior to applying the glue. 

I'm a bit sad that because of where the structure is sited, viewers cannot see the other side of the structure with the coal buckets. I also have not modeled the service track to the coal buckets where a gondola would dump the coal. Again, there is not really any space behind the coaling tower or for such a track to meaningfully connected to the rest of the fiddle yard.

However, at this point I'm happy with the compromise. The tower, along with the engine house, gives an impression that Erewhon is of some importance, even if there is no space to model much else. Perhaps in a future layout it can be incorporated where viewers may see more of the structure. 

The coaling tower installed on location in Erewhon

Looking across the fiddle yard in Erewhon toward the coaling tower. Erewhon station is at far right.


Sunday, 25 November 2018

John Ott's locomotive art prints

A month or so back I ordered two of John Ott's locomotive art prints that he has for sale on his early rail website http://www.ottgalleries.com/. The prints are in the style of the lithographs produced by locomotive builders in the mid 19th century.

When I enquired about purchasing the prints, I found that John has been very busy indeed and has completed many more prints than he has listed on his website, including a new version of the Central Pacific's Jupiter 4-4-0.

The new version is a likely colour scheme based on the latest research. As much as I like the Jupiter's blue colour scheme displayed on the replica at Promontory presently, I felt that if I was going to hang something on my wall I wanted it to be as authentic as possible. So I ordered a print of the Jupiter with her likely colour scheme. I also ordered a print of the 119. Both engines captivated my imagination as a young boy and are largely responsible for my interest in early railroads.

John Ott's prints of the Jupiter and the 119 hang on the wall along with a golden spike. (Unfortunately not real gold).

John was very helpful and shipped the two prints very promptly all the way to New Zealand. The prints spent some time with the local picture framers and I now have them back ready to go on the wall.

John has really put an incredible amount of research and detail into these prints. If you are a fan of early railroads, you won't be disappointed with these prints. They are fantastic and my kids think they are great too. Hopefully, they inspire another generation of early rail modellers.


Saturday, 10 November 2018

Track plan

Recently a reader asked if I had track plan of my layout. I had a drawing in the pipeline and their interest gave me the motivation to do the drawing properly and complete it.

So here is the plan for the Thoroughfare Gap Railroad 1895 in HO Scale, completed with good old paper and pen. I have created a separate page on the blog with a high-resolution copy of the track plan here.


The layout evolved into the current configuration The large island to right the original layout and the track plan was inspired by Ron Hatch’s HOn3 Fulton County Narrow Gauge Railroad featured in  Railroad Model Craftsman Sept 1994. This was alot of fun to build but operations were somewhat hamstrung due to a lack of staging. After a while I started to think seriously about expanding the layout. This was not surprising as I enjoy building scenery and there were a number of signature scenes I wanted to model but there had been no space on the original layout.

I didn't want the scenery on the layout to all be the same. I really liked the 'colour moods' approach to modelling scenery that John Olsen used on his Mescal Lines Railroad. You can find out more about this concept in John's article in the January 1984 issue of Model Railroader.

Following this concept, I imagined scenery transitioning to completely different environments to give the impression of the train going 'somewhere' and so added 'L' shaped corner section in modules up but not including the Erewhon section. This gave me the oppportunity to model the small town of Cass, a turntable, sawmill, decidous and redwood forests and a logging scene.

The mainline continued on past the redwood logging scene to a temporary fiddle yard. This was not satisfactory from an operating point of view. If felt the line needed a natural end point and the temporary staging did not have enough space for all my locomotives and rolling stock. I did not like handling the trains everytime on had finished a run so I built Erewhon section which is actually part of a large shelving unit.

Erewhon is a complete compromise. I only had a certain amount of real estate as it is part of a storage shelf unit. I needed tracks to store and turn locomotives, a run around loop and sufficent trackage to store my cars. I also wanted to have a go at making a snow scene which I wrote a little about here and here.


Monday, 5 November 2018

A new locomotive...


My latest modelling project has been kitbashing a new locomotive. If you have explored my locomotives page, you will know that I have three 4-4-0s, one 2-8-0 and one 4-6-0 on the roster. However, I've been missing a 2-6-0 and wanted to fill that gap.

There are not many 2-6-0 pre turn of the century models available. There is a brass mogul which are expensive or the Roundhouse/Athearn 2-6-0 model which is quite beefy for a pre 1900 locomotive.

John Ott has a page on his fantastic website outlining how he kitbashed a Roundhouse 2-6-0 mechanism with a boiler from the Tyco/Mantua 4-6-0 locomotive. You can see John's modelling here. I really liked John's model and decided long ago to give the conversion a crack myself. I already had a junked Mantua 4-6-0 in my draw and finally I managed to buy an old Roundhouse 2-6-0 mechanism.

You will see I borrowed John's concept and many of his ideas like the paper sectional counterweights for the driving wheels. This technique was really simple and looks really good. I'm thinking of applying it to the Bachmann Spectrum 4-4-0 and 4-6-0. John's model is of a much higher standard than my attempt. Nevertheless, I'm pleased with my final result and enjoyed the project.

I stuck to the basic concept and used the Roundhouse mechanism with the shortened Mantua boiler. But, rather than scratchbuilding a cab I retained the Roundhouse one. I also used a spare tender from a burnt out Bachmann Spectrum 4-6-0 and pilfered some of 4-6-0 details, like the bell, headlight lens, airpump and pipework. The oil lamp housing itself came from an old Bachmann 4-4-0 (old tooling) model. Surprising the headlight lens from the burnt out 4-6-0 was the perfect fit for the housing and snapped into place. I also ditched the open frame motor in favour of a can motor. After taking the photos I realised the model is missing airtanks under the running boards so I will add these at some stage.

I chose to paint the cab to represent a wood finish. I like wood cabs and felt an all black cab would make the locomotive too dark, especially when compared with the rest of the roster. The decals were made in photoshop and printed on white decal paper.

The locomotive has a Tsunami 2 sound decoder fitted, along with a current keeper. I have been very impressed with this decoder. It was easy to install and set up using JMRI Decoder Pro. I am especially enjoying the cut off feature which allows you to adjust the steam cut off, while the locomotive is moving. This allows the locomotive to truely 'drift' downgrade with just the rod clanking sounds. Given my layout has a large grade, I really enjoy this feature. When funds allow, It will be hard to restrain myself from upgrading the existing Tsunami 1 sound decoders in the two Spectrum engines and the 2-8-0.

The current keeper is a game changer. This device allows the locomotive to continue moving for up to 10 seconds after power has been lost. More than enough time to assist the locomotive over any dirty track. The risk of course is that if the locomotive derails it may keep on travelling over the scenery causing damage or perhaps find its way to the floor. I believe the risk of this is relatively minimal and the flawless running with the current keeper is next level. I am seriously thinking about installing current keepers in my other locomotives that will accept them, like the Bachmann Spectrum 4-4-0 and 4-6-0 and perhaps the 2-8-0. Although, the 2-8-0 may not have the space given it's tender is smaller.

I hope to do a Youtube video sometime to talk about the project and show what the locomotive is capable of. When I do I will post it here.

This is the link to my Youtube channel


Monday, 22 October 2018

Waimea Plains Railway

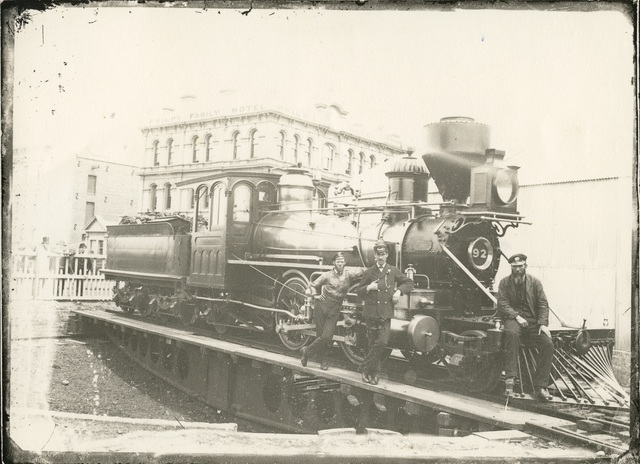
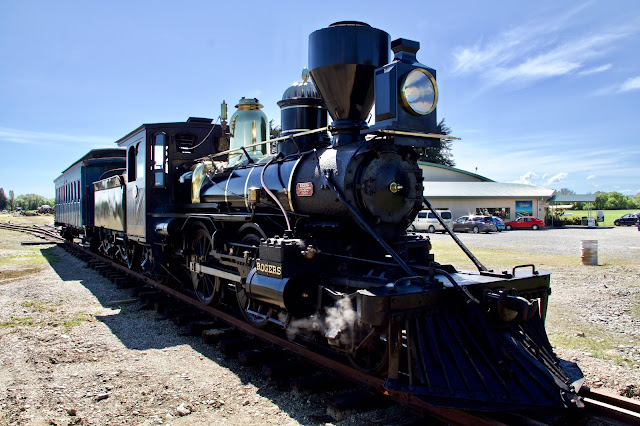
As an early rail modeller, I'm fortunate that 15 minutes drive from where I live, a small dedicated group of individuals is recreating a piece of early New Zealand Railway history. The Waimea Plains Railway is recreating the Mandeville goods/freight yards. The Trust owns an 1878 Rogers locomotive K92 imported from the USA in that year for use on the New Zealand Government Railways. The group restored/rebuilt the locomotive to working  condition a number of years ago and on the 20th and 21st of October they fired it up and held an open day for the public.

I took the kids out for a look and we had a great time. Presently, the railway has only a few hundred metres of track and one operable coach , which was first built in 1892! The locomotive was in service for 48 years and during that time it's original wagon top boiler and russia iron boiler jacket was replaced.

The locomotive is slightly unusual in that it is a 2-4-2 wheel arrangement or "Columbia" type. Two of this type were procured from Rogers in 1877 as a trial. Their arrival caused quite a stir in New Zealand, which up until that time had only used British built locomotives. They were quite a bit different to their British counterparts, with bar frames, Gothic style wooden cabs, locomotive bell and the usual kaleidoscope of colours typical of American locomotives of that period.

The first two locomotives were a success and six more of the class were ordered from Rogers, including K92.

The image below (linked from the Waimea Plains website) shows K92 in what was probably her original form. The wagon top boiler and Russia iron jacket can be readily seen. The steam dome is also closer to the cab, typical of American locomotives of that period. Coincidently, this very turntable is also in the possession of the Trust and it's restoration is well underway.

At the end of it's life K92 was pushed into a local river to help combat riverbank erosion. It lay there for many years until it was retrieved and restored. You can read more about K92's story and the Waimea Plains Railway here.


K92 today. The highly polished boiler jacket reflects the blue sky and the green fields around Mandeville. The firebox is noticeably more square and the steam dome is above the second driver. The reconstructed wooden cab is also less Gothic in style.


Saturday, 20 October 2018

The great little train show

Today the children and I took a trip to Invercargill, a 40 minute drive, to see the annual model train show. The Southland Model Engineers Society covers a variety of modelling interests including trains, RC boats and cars and aircraft modellers. There were also exhibits by some other groups like the local woodworkers guild and the Southland Lug group (Lego).

Most of the train exhibits are typically of a British, European and occasionally, American flavour. Being an early rail modeller, I usually don't find anything for sale in the stalls that fits my era and theme. However, I enjoy browsing the exhibits. I tend to look for scenery ideas and techniques that I can use as scenery is not usually dependent on one's chosen modelling era.

One layout I particularly enjoyed was the New Zealand Railway Model Railway Guild's 1:64 NZR layout depicting typical scenes from Southland and Otago. There are not a lot of products available in this scale, though there is one business in New Zealand that does produce rolling stock kits. The locomotives are all limited run kits and are hard to come by. There were only a few buildings on layout, and all appeared scratch built or heavily kit-bashed.

A great feature of this layout was the sense of space the builders had created. A lot of the space was devoted to open pasture land and rural scenes. In the one urbanised area, the buildings were realistically spaced and because of this, there they were relatively few and far between. A distinct advantage when you have to scratch build everything! The scenery was nicely done and used a variety of products to create a pleasing scene. The

 The realistic weathering on the steam locomotives and rolling stock was also another highlight. It really was enjoyable to rail fan the trains on this layout.

Here are some photos of that layout that I snapped on my phone:

Pacing an NZR A class


A passenger train headed by the NZR A class snakes its way through the country side


A typical rural scene form New Zealand. Flax and scrub litter the pasture land. 


Monday, 1 October 2018

Some different models

When I was a teenager I used to build 1.72 scale model aircraft. I kept these models in a shoebox that has somehow managed to follow me around my university days and first 10 years of marriage. I dug them out earlier this year to show my son who is nearly five years old. He was very taken with them and I thought it would be cool to work on a kit with him. Even though the skills were not there, his enthusiasm certainly was. I welcomed the opportunity to for a different modelling challenge.

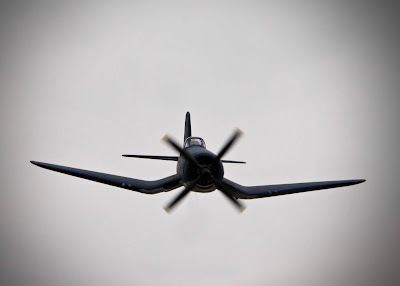
We started with a model of a Corsair, (Skipper if you have ever watched Pixar's movie Planes). This was pretty easy as it was mostly one colour and was made up of only a few key pieces. My Son did well with this kit. He would sit on my lap, I'd load up the flat brush and he would paint where I directed him. I would take over every so often so as to smooth out some of the imperfections (I couldn't help myself), but he certainly earned his kids wings.


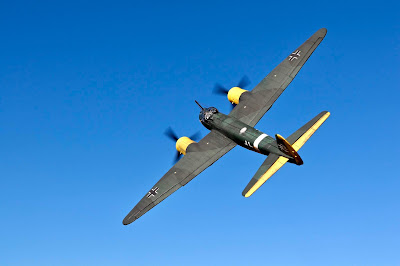
After this, I decided a twin-engine bomber kit would be good for him because it has more surface area right? easier for him to paint? Well no. I chose a nice Revell JU88 kit, of course, a JU88 has a lot of glass to mask off and you see more of the interior made up of little bits and pieces. Nevermind. When he was in bed I spent a few evenings doing the itsy bitsy bits and masking the canopy. He and I then assembled the plane and I masked the camouflage pattern and we followed the same technique as the Corsair.

After the models were complete, we took photos of the models. We mounted the planes on a stick and my son held a hair dryer up at the planes to spin the propellors. All photos were taken outside in natural sunlight. All in all, great projects.

But back to the trains now...


Saturday, 8 September 2018

Logging bridge

I have not spent alot of time working on the layout the since April. I've stuck to running trains when I can and I've also been building model aircraft kits with my son (more about that later).

I had a month off work in April, so I got alot achieved. The last major scenery project I completed was completing a timber and log trestle which connects the sawmill and the logging skid site. I followed some examples from period photos where bridges were built on a base of logs. Building a base of logs meant I had a more level base on which to build the trestle bents. I think it also adds some character to this portion of the layout.

Growing up I loved Bill Peet's childrens book, The Caboose that got loose. My more whimsical side would love to be able to wedge a caboose between 'two towering spruce' down in the gorge. However, I think I dont think it will fit. I think I will perhaps model a wrecked caboose down in the gorge one day instead. What do you think?


Wednesday, 11 April 2018

Flagman

Recently I've been reading some biographies of railroaders from the late 1800s which have been fascinating reads. If you have the inclination I thoroughly recommend reading "Little engines big men" by Gilbert Lathrop and "Clear the tracks!" By Joseph Bromley.

Both these books recount the life of railroad workers and include reference to flagmen. When a train stopped in an unexpected or dangerous place, perhaps to attend to some problem or perform some switching manoeuvres which may foul the main, the conductor would send out a flagman to warn approaching trains.

I've heard of other modelers including brakemen when the operating their layout and thought I'd make a couple.

This is something I might use if I feel so inclined while I'm operating. I generally operate alone so don't have to "warn" anybody else. However, it completes the scene and is a fun little detail if one is wanting to feel immersed in operating.

The flags are simply small squares of copy paper coloured with my daughter's red felt pen. They are glued to a sewing pin which was cut to size and blackened with a permanent marker.

The figures are from an old train crew set by Bachmann which my father repainted many years ago.

Maybe I'll take a photo of them in use one day and post here.

L.

Tuesday, 6 February 2018

2018 photos

I haven't been working on the layout too much lately. Though, I have been working on bits and pieces here and there.We've had a very hot summer and it has often been too warm in the garage to work on the layout.

The heat also caused some expansion of the rails. All my rails are soldered together for electrical conductivity. Because the rails had no room to expand they kinked in several places around the layout. It wasn't really a problem, however, I noticed that some of my more temperamental rolling stock started having more derailments.

Now that the temperature has returned to normal, the trains are behaving themselves again and operations are more enjoyable.

At the start of each year, I usually take some photos of the layout. I often use helicon focus to stack several images together to get a greater depth of field. I've been working on a few today so here they are.

Leviathan hauls are passenger train out of the redwood grove and into Erewhon Tunnel

Leviathan hauling her passenger train through the redwood grove

A family waits for their passenger train.

Firefly simmers in Erewhon yard under the silent mountain peaks.