Showing posts with label Roundhouse. Show all posts

Sunday, 8 December 2024

Stone Roundhouse Scratchbuild Part 6


This may be the last update for the roundhouse for a while, I'm pretty happy with where it ended up. 

I added some wooden flooring, scribed and weathered balsa. In time I'll rafters, framing and vertical roof supports and I hope to detail the interior. But for now, it's ok. I scratchbuilt doors using pre-scribed balsa sheet and added framing using cardstock. I made a card template and mass-produced these over several evenings. For now, they are just glued in place.

I also took a photo of the exterior of the roundhouse and duplicated it in Photoshop to make a continuous print that could be used as a stand-in for a back wall. Again, it is not a final solution, but more like a temporary stage prop to help the illusion. 

Lastly,  a temporary roof was made with cardstock and copier paper layered on to represent tar paper. 

The layout is being prepared for its ultimate test, being able to move. I'm very pleased to have the roundhouse project to this point prior to moving as it feels like a natural stopping point for this module. 


Friday, 22 November 2024

Stone Roundhouse Scratchbuild Part 5

With the stone roundhouse off the jig, it was time to test it on the layout. I'm happy with the colouring and how it compliments the backdrop colouring, looking like the stone was quarried locally. Next steps will be to glue it in place and add ground cover to blend it into the scene.

In terms of the interior, I plan to make a wooden floor. The few prototype photos I've been able to find show early roundhouses either had stone, dirt or wood floors. After reading about others experience with making service pits, I've decided not to add these. Though, one or two could be added at a later date when I spend more time on the interior. 

After gluing it down I will need to scratch build some doors and a temporary roof.


Friday, 8 November 2024

Stone Roundhouse Scratchbuild Part 4


Just a short update on the Stone Roundhouse project. I used the same 'leopard spot' technique that I use for painting rock casting to paint the roundhouse stones. I painted individual stones an assortment of earth colours and then blended them together with a earth tan wash. On a test section I first tried a raw sienna wash, but this turned out too yellow. The tan gave more of the colour I was looking for. I was sure to check out the colouring under the layout lighting at several stages to make sure that it would end up looking right on the layout.

After the paints were completely dry, I light dry brush with white brought out some highlights and dulled down any bits that seemed too bright. The next step it to remove it from the jig and install it on the layout.


Friday, 6 September 2024

Stone Roundhouse Scratchbuild Part 3

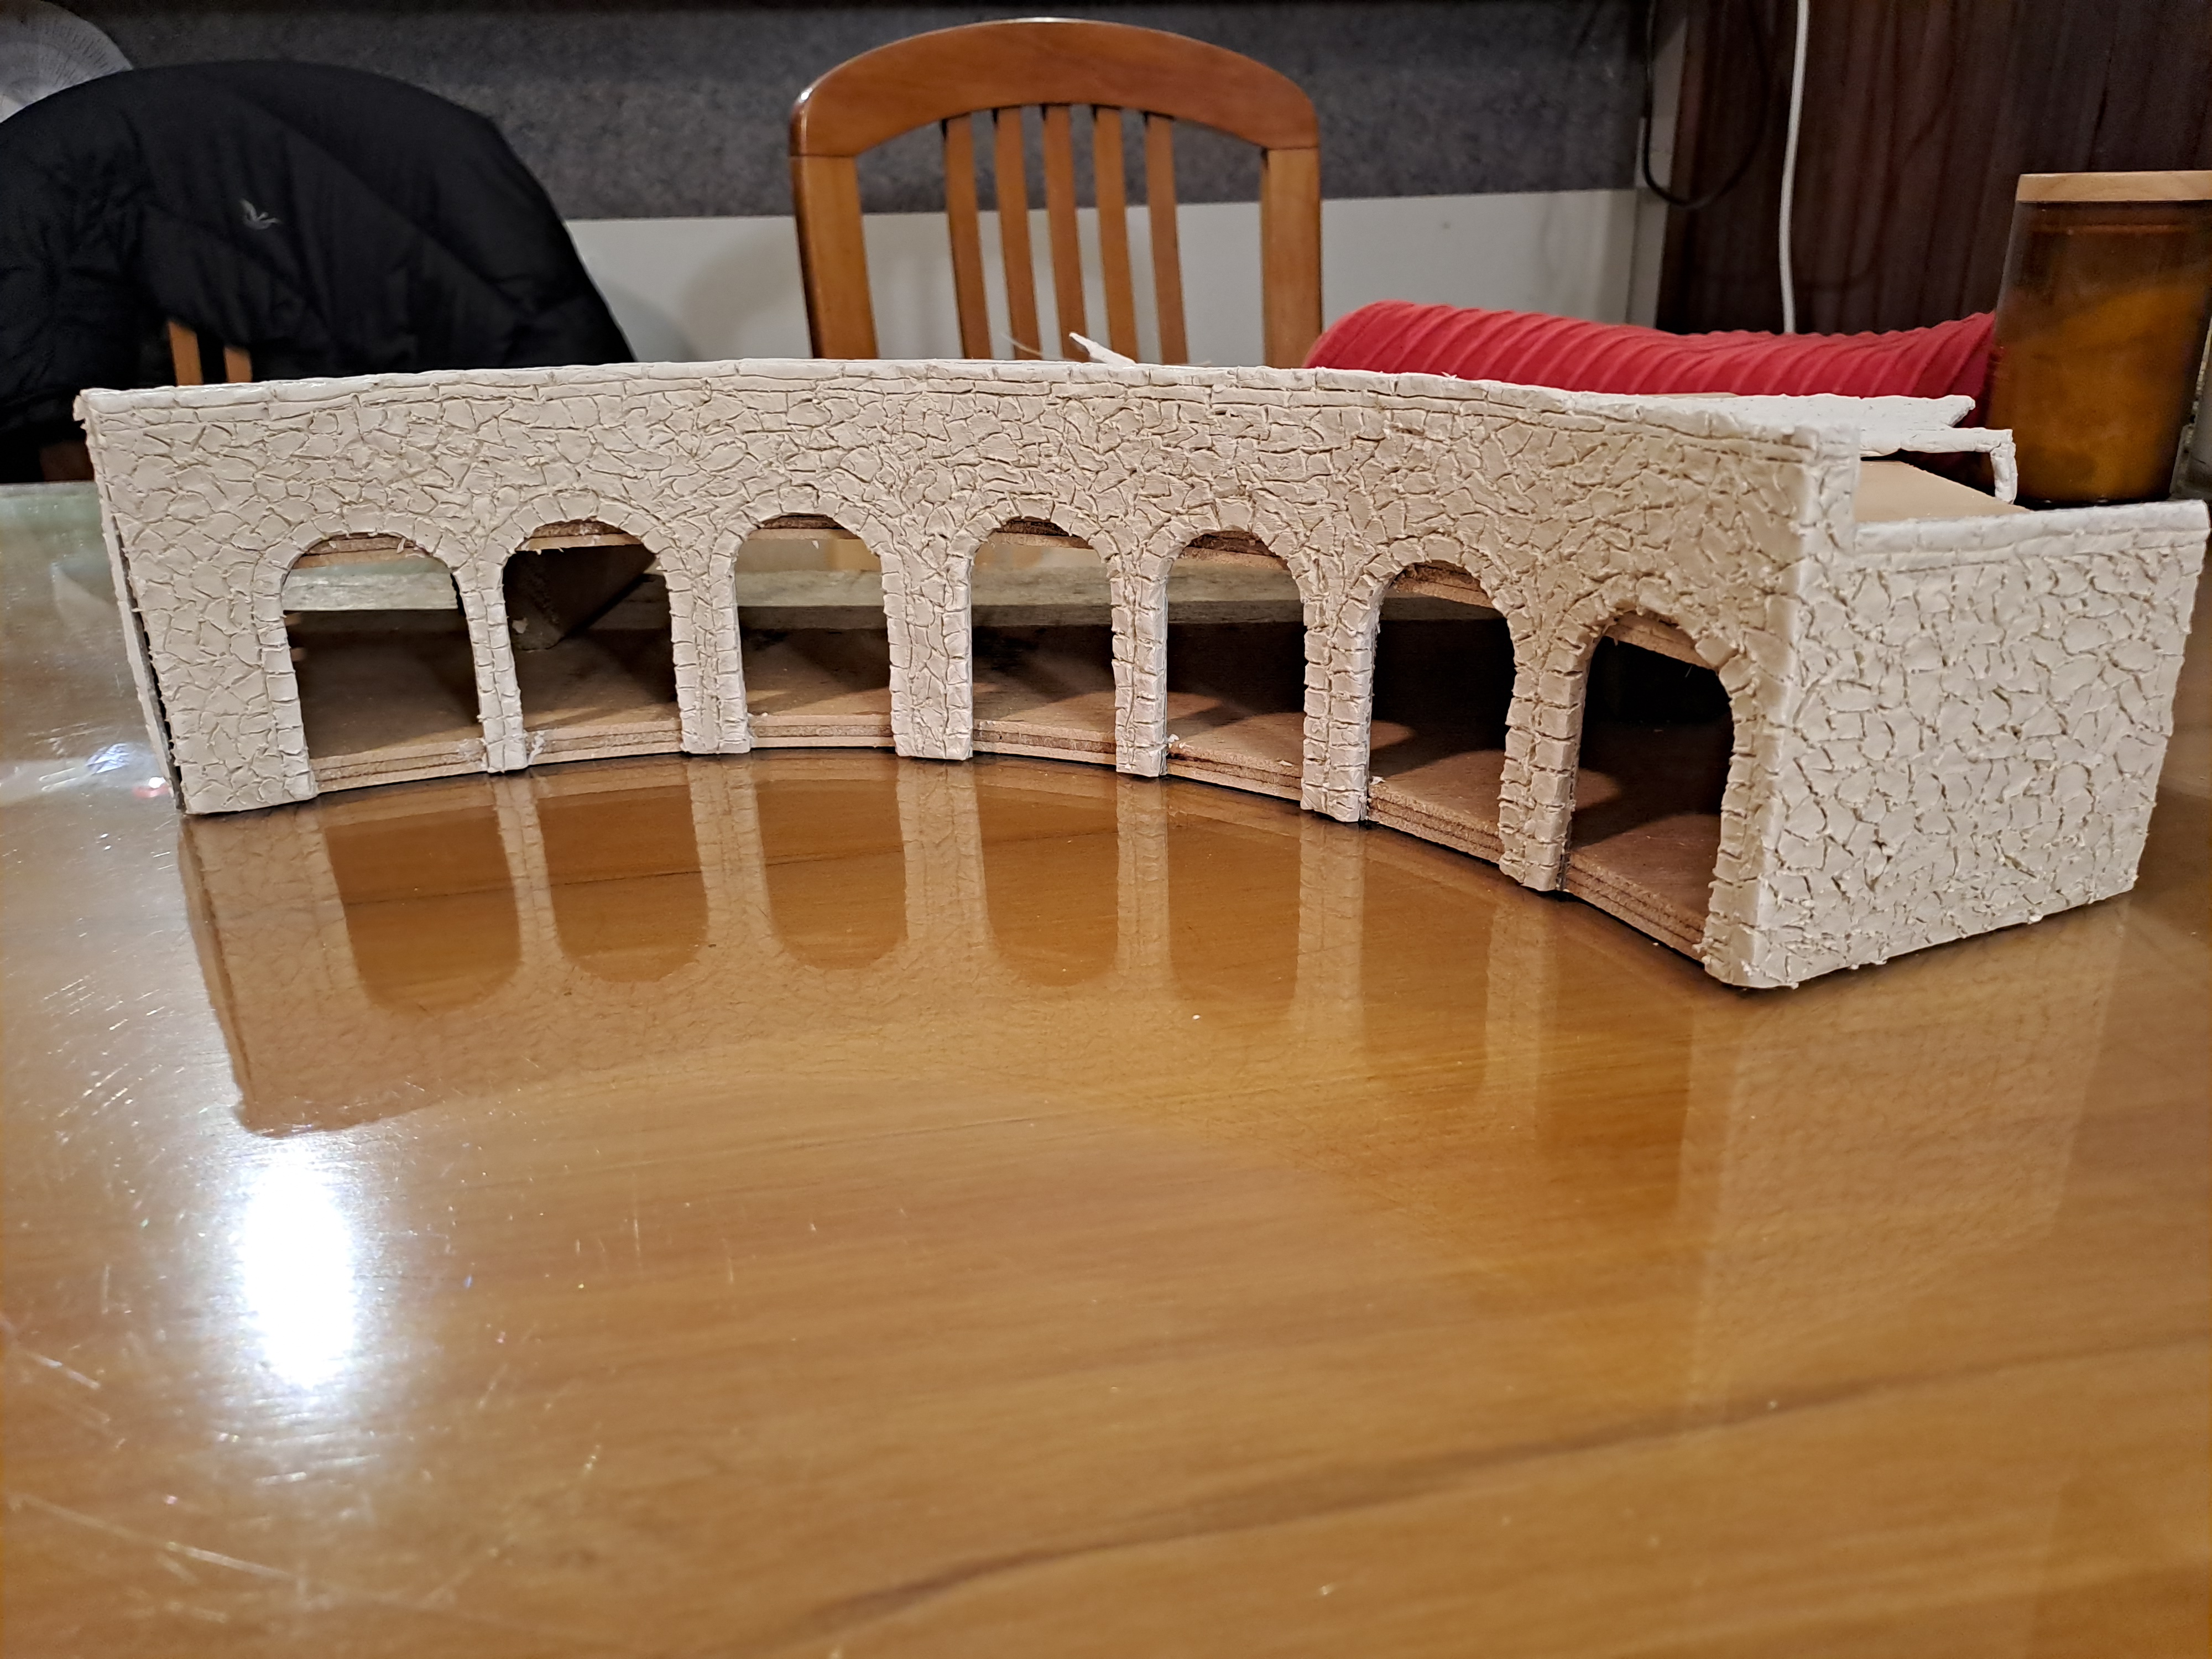
 After sorting out the jig and wall template for the front and far side of the roundhouse, I added the layer of clay and started carving. This went faster than I expected. I could have benefited from a smaller pick, as the one I had was quite long (from my workshop) making it a little harder to use with finesse. 

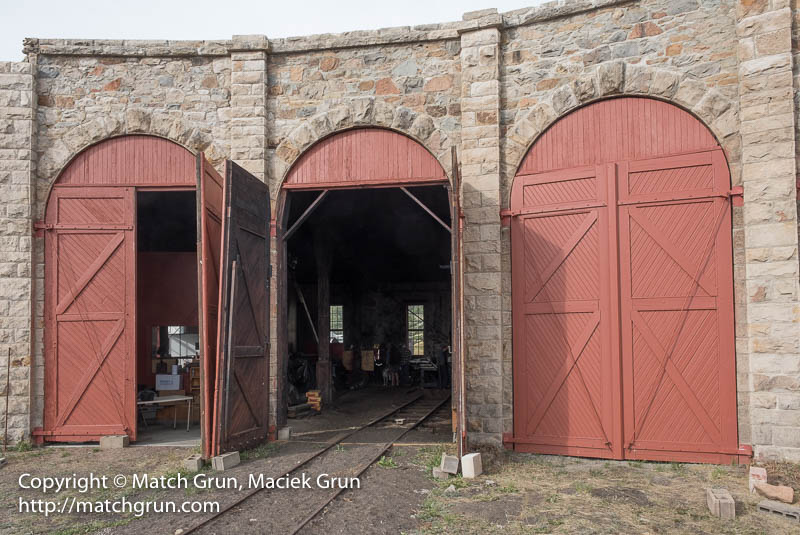
As it dried, I test-fitted some doors from my two-stall engine house from the old layout, which I used as a template for the engine doors. I would like to be able to have some of the doors be able to open and shut, but I'm not sure yet how I would make a resilient hinge that is also discrete. I will keep researching this and may initially just glue them open.

The prototype roundhouse has supporting columns in between each stall and on the edges of the roundhouse. At this stage I don't think I'll add these. Because they will be thin they will be more difficult to carve and additionally, it would likely draw more attention to my uneven stall spacing. 


Friday, 23 August 2024

Stone Roundhouse Scratchbuild Part 2


After building the side wall, I made a cardboard wall template for the front and far wall of the Roundhouse. Test fitting the template on the layout was important and I snapped a few photos below. Even the bare walls give a good impression of how the structure is going to change this whole scene. 

To make sure the clay dried at the correct angles for the front of the roundhouse I created a jig from plywood. I laid out a sheet of paper, took a rubbing with the pencil of the location of all the roundhouse tracks and then plotted the front wall of the roundhouse on the paper. The paper was then placed on some scrap plywood and cut out with a jigsaw. I cut two bits of plywood and spaced them out with scrap wood. Finally, I used Mod Podge to glue the cardboard wall template to the jig so that when the clay dries it will not pull the cardboard away from the jig. 


I'm looking forward to seeing this scene come to life as the project progresses.


The cardboard wall glued to the plywood jig


Friday, 9 August 2024

Stone Roundhouse Scratchbuild Part 1

While most of the buildings from the old layout are being reused for the modular layout, I was excited to have space in my design for a roundhouse. Early on I decided I would like to base the building on the Denver, South Park and Southern's stone roundhouse at Como, Colorado. This structure, which survives today and has been preserved, was built in 1881. In its current configuration, the engine doors have been squared off. I read somewhere when this occurred, but I can't recall what the year was. But it was sometime after the turn of the 19th century. I will be modelling the doors as full length, with the arch. 

There is a kit available for this building, but I wanted to scratch-build something to suit my space. I also knew that my track geometry coming off the turntable was not perfectly spaced, due to the way my yard tracks lined up with the turntable pit. 


The most attractive feature that I want to model is the rough-cut stonework. I had read several articles about modelling European stone buildings using air-dry modelling clay. After figuring out the measuments, I decided to start with the wall closest to the layout's edge. 

I created a wall template from thick cardboard. This allowed me to cut out window and door spaces and would give the clay some support. I brushed on a thick layer of Mod Podge and then rolled out the clay on top, trimming it to fit, using the cardboard template as a guide. 


Then using a pick, I started carving the grooves for the stonework. My blocks are larger than the prototype, and the grooves are likely out of scale too. However, I'm pleased with the look that I achieved. 


While carving there is a lot of clay 'flash' that makes the carving look terrible. In my first attempts I tried to remove this and ended up making a mess. Then I read an article where they they said the secret is to leave all the clay 'flash' in place and brush it off when its dry. This worked really well and as the clay dried over the next day or so I felt it kept looking better and better. 

Finally, I test fitted some engine house windows, which I was pleased to find fitted perfectly. I'll paint the window frames and doors a similar shade of red to the prototype.