This may be the last update for the roundhouse for a while, I'm pretty happy with where it ended up.
I added some wooden flooring, scribed and weathered balsa. In time I'll rafters, framing and vertical roof supports and I hope to detail the interior. But for now, it's ok. I scratchbuilt doors using pre-scribed balsa sheet and added framing using cardstock. I made a card template and mass-produced these over several evenings. For now, they are just glued in place.
I also took a photo of the exterior of the roundhouse and duplicated it in Photoshop to make a continuous print that could be used as a stand-in for a back wall. Again, it is not a final solution, but more like a temporary stage prop to help the illusion.
Lastly, a temporary roof was made with cardstock and copier paper layered on to represent tar paper.
The layout is being prepared for its ultimate test, being able to move. I'm very pleased to have the roundhouse project to this point prior to moving as it feels like a natural stopping point for this module.
With the stone roundhouse off the jig, it was time to test it on the layout. I'm happy with the colouring and how it compliments the backdrop colouring, looking like the stone was quarried locally. Next steps will be to glue it in place and add ground cover to blend it into the scene.
In terms of the interior, I plan to make a wooden floor. The few prototype photos I've been able to find show early roundhouses either had stone, dirt or wood floors. After reading about others experience with making service pits, I've decided not to add these. Though, one or two could be added at a later date when I spend more time on the interior.
After gluing it down I will need to scratch build some doors and a temporary roof.
Just a short update on the Stone Roundhouse project. I used the same 'leopard spot' technique that I use for painting rock casting to paint the roundhouse stones. I painted individual stones an assortment of earth colours and then blended them together with a earth tan wash. On a test section I first tried a raw sienna wash, but this turned out too yellow. The tan gave more of the colour I was looking for. I was sure to check out the colouring under the layout lighting at several stages to make sure that it would end up looking right on the layout.
After the paints were completely dry, I light dry brush with white brought out some highlights and dulled down any bits that seemed too bright. The next step it to remove it from the jig and install it on the layout.
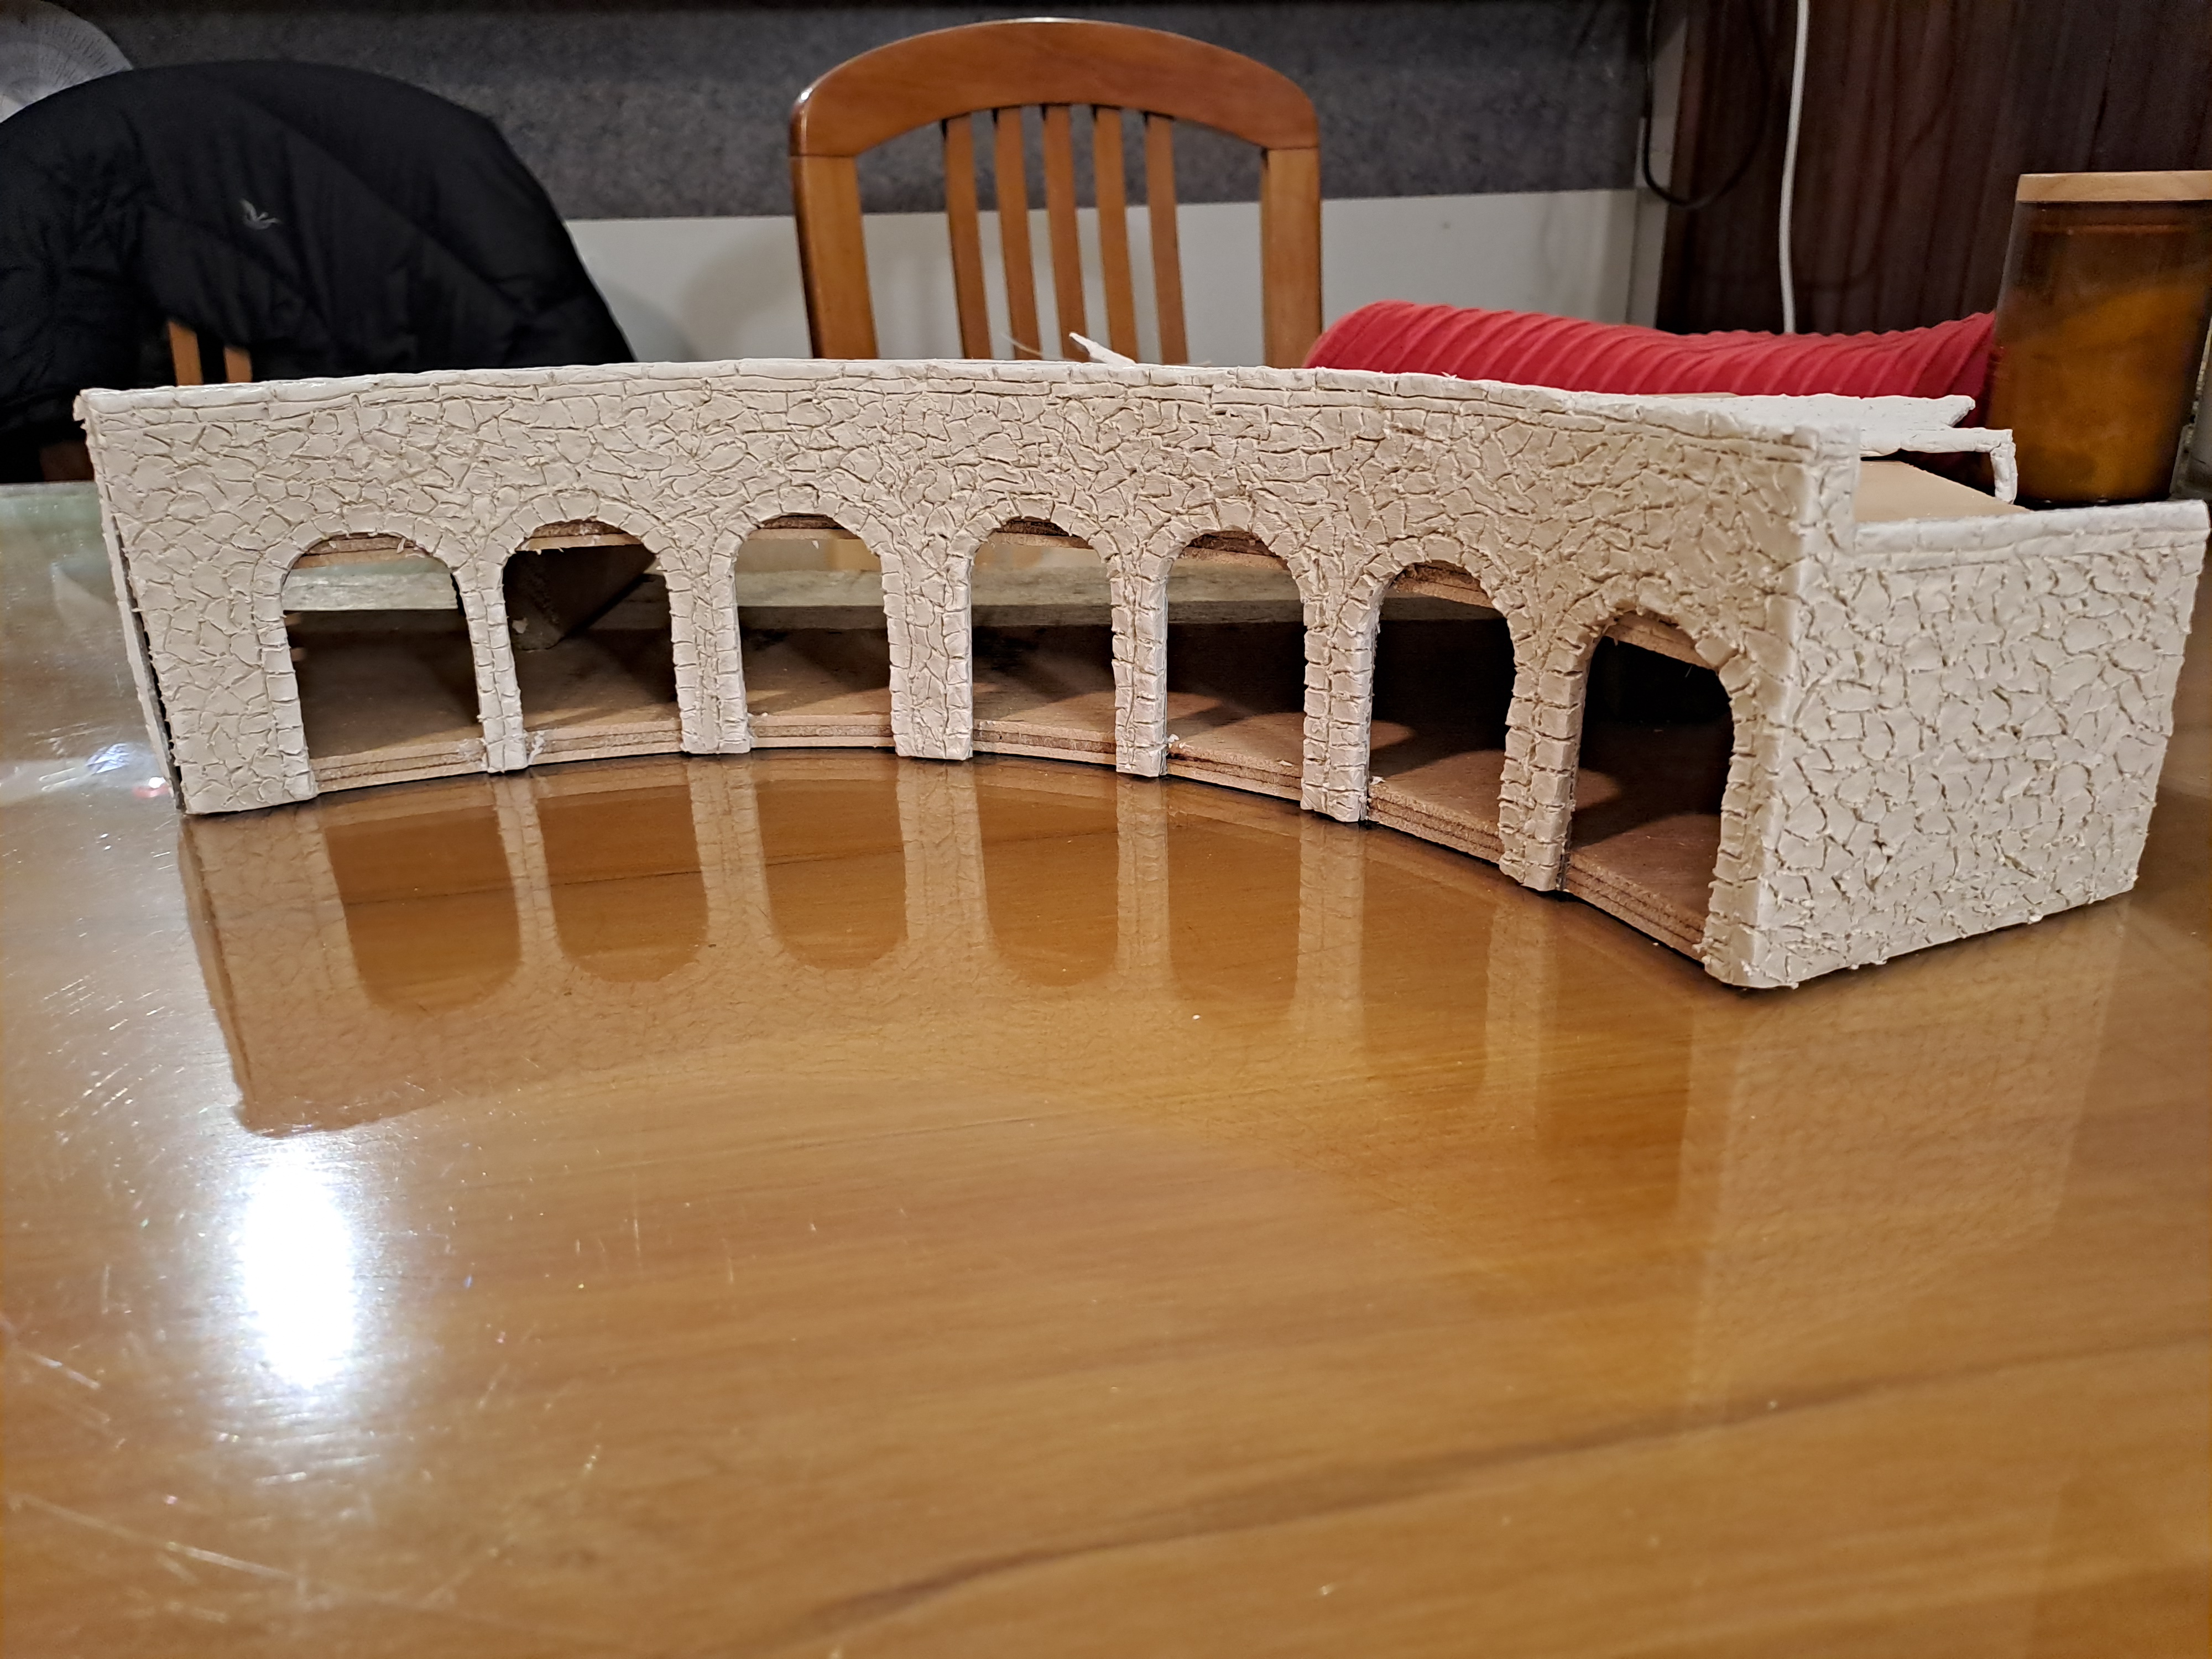
After sorting out the jig and wall template for the front and far side of the roundhouse, I added the layer of clay and started carving. This went faster than I expected. I could have benefited from a smaller pick, as the one I had was quite long (from my workshop) making it a little harder to use with finesse.
As it dried, I test-fitted some doors from my two-stall engine house from the old layout, which I used as a template for the engine doors. I would like to be able to have some of the doors be able to open and shut, but I'm not sure yet how I would make a resilient hinge that is also discrete. I will keep researching this and may initially just glue them open.
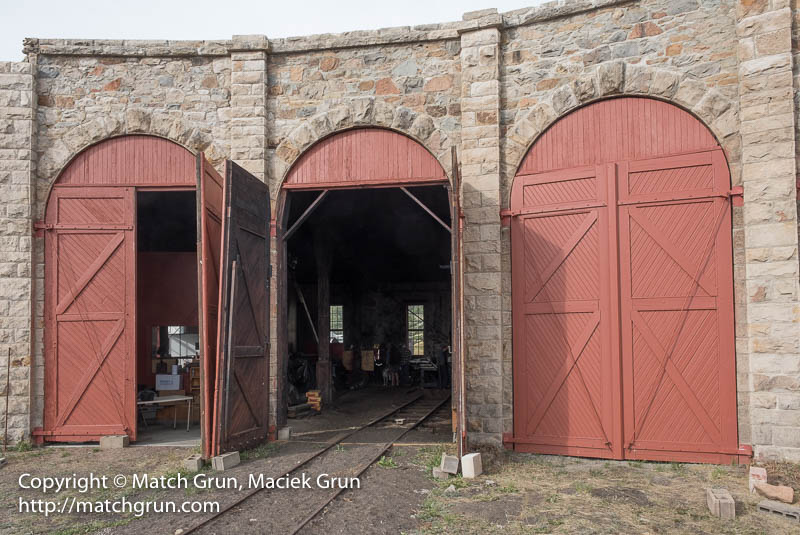
The prototype roundhouse has supporting columns in between each stall and on the edges of the roundhouse. At this stage I don't think I'll add these. Because they will be thin they will be more difficult to carve and additionally, it would likely draw more attention to my uneven stall spacing.
After building the side wall, I made a cardboard wall template for the front and far wall of the Roundhouse. Test fitting the template on the layout was important and I snapped a few photos below. Even the bare walls give a good impression of how the structure is going to change this whole scene.
To make sure the clay dried at the correct angles for the front of the roundhouse I created a jig from plywood. I laid out a sheet of paper, took a rubbing with the pencil of the location of all the roundhouse tracks and then plotted the front wall of the roundhouse on the paper. The paper was then placed on some scrap plywood and cut out with a jigsaw. I cut two bits of plywood and spaced them out with scrap wood. Finally, I used Mod Podge to glue the cardboard wall template to the jig so that when the clay dries it will not pull the cardboard away from the jig.
I'm looking forward to seeing this scene come to life as the project progresses.
While most of the buildings from the old layout are being reused for the modular layout, I was excited to have space in my design for a roundhouse. Early on I decided I would like to base the building on the Denver, South Park and Southern's stone roundhouse at Como, Colorado. This structure, which survives today and has been preserved, was built in 1881. In its current configuration, the engine doors have been squared off. I read somewhere when this occurred, but I can't recall what the year was. But it was sometime after the turn of the 19th century. I will be modelling the doors as full length, with the arch.
There is a kit available for this building, but I wanted to scratch-build something to suit my space. I also knew that my track geometry coming off the turntable was not perfectly spaced, due to the way my yard tracks lined up with the turntable pit.
The most attractive feature that I want to model is the rough-cut stonework. I had read several articles about modelling European stone buildings using air-dry modelling clay. After figuring out the measuments, I decided to start with the wall closest to the layout's edge.
I created a wall template from thick cardboard. This allowed me to cut out window and door spaces and would give the clay some support. I brushed on a thick layer of Mod Podge and then rolled out the clay on top, trimming it to fit, using the cardboard template as a guide.
Then using a pick, I started carving the grooves for the stonework. My blocks are larger than the prototype, and the grooves are likely out of scale too. However, I'm pleased with the look that I achieved.
While carving there is a lot of clay 'flash' that makes the carving look terrible. In my first attempts I tried to remove this and ended up making a mess. Then I read an article where they they said the secret is to leave all the clay 'flash' in place and brush it off when its dry. This worked really well and as the clay dried over the next day or so I felt it kept looking better and better.
Finally, I test fitted some engine house windows, which I was pleased to find fitted perfectly. I'll paint the window frames and doors a similar shade of red to the prototype.
I am reusing the buildings from the original layout. Before I got too much further with the ground cover, I wanted to decide more or less which buildings were going to feature in which of the two towns. I tried different combinations of buildings on the module and then set up the other buildings on a piece of foam with the same dimensions as a module as a mock-up of the other town module that is yet to be built. I made sure I placed a piece of track on the mock-up to get an idea of how the train would run through that scene.
I had a few criteria when arranging the buildings:
The side of the buildings with the most windows or detailing should face the edge of the layout. This will help when I add lights and interiors later.
There were several buildings I liked better than others and so I wanted those closer to the viewer. For example, the saloon, the bakery, the bank/land office, the Gunsmith/Lawyer and the Four Sisters Hotel.
In general, I had a preference for taller buildings nearer the edge of the layout and smaller ones further in, to help create a slight forced-perspective effect.
I did not want the street to be perpendicular to the layout edge.
In the end, I settled on the building arrangements in the following photos:
Clockwise from top right, Assayers, Dry Goods, Columba Hotel, Bank/Land Office, Bakery, Hay & Grain, Shoe shop.
I avoided placing buildings or boardwalks over the join between two modules.
A mock-up of the yet-to-be-built town. Clockwise from bottom left: Saloon, Stove & Tin Shop, Doctors rooms, building under construction, Sheriff's office, Rooming house, Livery stable, Four Sisters Hotel, Gunsmith & Lawyer
A street view of the mockup. I am of a mind to adjust the rooming house footprint to make it better fit the space available. But I'll build the module first to see how it looks.
Turn of the century modeller, Don Ball, has a fantastic layout set in California in 1895. You can check out his blog here. Don is a prototype modeller and his work is exceptional; his layout has been featured in Model Railroad Hobbyist and the Railroad Model Craftsman publications.
Don's Stockton and Copperopolis Railroad features several oil depots and tank cars. Oil traffic was something my layout was lacking. While you can't have it all, I liked the look of what he had done and a few months back I went about adding a scene to the layout. Don had modelled part of an oil distribution centre on the edge of his layout (see page 10 of the MRH layout article linked above). I had an area at the end of my team track that was underused where I could try something similar, but less detailed. I built a fence around the area for the depot with gates and made a sign, based on the one on Don's layout.
The tanks themselves were from MDC old-time tank car kits. I painted and recalled them for the Union Tank Line and mounted them on 30' flat cars. Gloss black paint made good authentic-looking oil spills. Since taking the photos below I've added oil spills on the ground and made the area look a little more 'used'. Overall, I'm pleased with what it brings to the layout in terms of interest and operations.
Modelling only part of an industry or structure can be a good way to make the layout seem larger than it is. Have you used this technique on your layout?
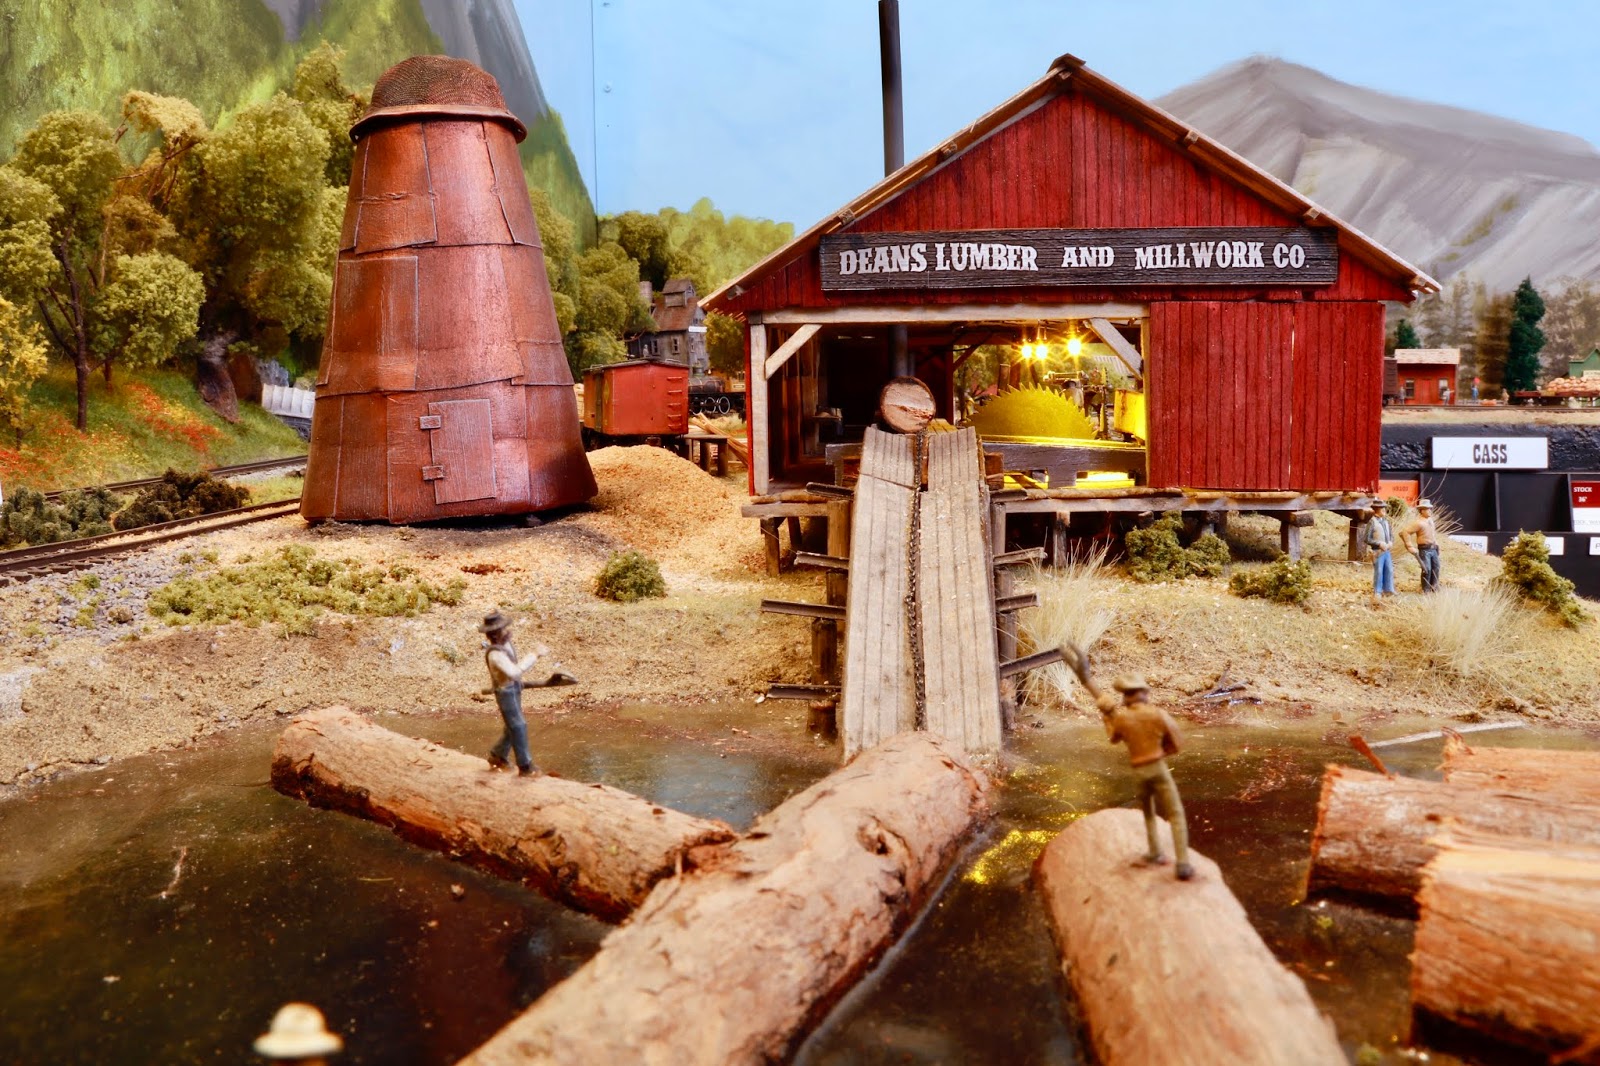
One of the signature features of my layout is the sawmill near Cass, which I started in 2016. However, this scene has never been completed. There were several key features missing. Without them, the scene looked a little silly as there was no way to unload the logs from the trains into the pond, get the logs from the pond into the mill, and get the sawn timber out of the mill to the drying and sorting yard.
Finally, the I go the motivation to complete the scene and now Dean's Lumber and Millwork Company has a Jill poke to unload logs, a log chute with chain winch to haul logs into the mill, an extended deck out the other end of the mill, to support the tail end of the dead rollers and a car loading platform for loading finished lumber onto trains.
The interior of the sawmill is detailed with 3D printed model purchased from DonVA's Shapeways shop, Fine Scale Models. Don has done a superb job with his sawmill interior models and it was a pleasure to add it to my mill. Unfortunately, the logs in my pond (made before I had the interior kit) are a bit longer than Don's log carriage. Normally, the team in the woods would buck the logs to the appropriate length. However, I was not going redo my millpond scene, so I scratch built a large circular bucking saw to buck the logs in two on the log deck before logs reach the main double saw breaks them down into slabs. I'm not sure this is prototypical, though I did see at least one photo of a large circular bucking saw in use but, that may have been from a later time period. Nevertheless, the bucking saw adds a little bit of believability that the mill can handle the longer logs sitting in the pond.
I also redid the overhead lights in the mill so that viewers looking at the side of the building had a better view of the interior.
I'll add some bark chips around the Jill poke and other details in due course. But for now, I think I can now saw the scene is largely complete.
The Jill poke for unloading logs. The end of the boom is set against the side of the log. As the locomotive pulls the train through the poke, the boom pivots, pushing the log out and off the car.
The extended deck to the sorting and drying yard. The loading platform in the background is also new. The mill boiler has a flickering red LED to simulate the fire.
A view from the millpond into the mill. The new bucking saw can be seen under the lights.
Looking into the side of the mill, one can see its a hive of activity.
With the roof off, one can see all the details from Don's 3D printed sawmill models more clearly.
Both the towns I have modelled on my layout have stock pens. Shipping livestock is a big part of the business on the thoroughfare gap railroad.
Each town has a trackside corral though, neither had a way of loading the livestock on and off the trains. I've been meaning to make up some loading ramps for several years now but somehow, I've never got around to it.
Recently I discovered a seller on Trade me, the NZ version of eBay, selling some stock loading ramps as 3d printed kits. I purchased four and the went together really easily.
After a little paint and some weathering with soft pastels, they were ready for the layout.
The corral at Cass and the two loading ramps in position. It's great to finally have these little details to complete the scene.
The problem with Maastrecht's Mill is that there was not a space for it on the layout. Logically, it would fit best near water. The only place with running water on the layout is in the Canyon, but the scenery is arider. Not the place you expect to find a flour mill.
The most logical spot was the corner of the layout near Cass and the Sawmill. There was a little wooded hill that rises into the backdrop. Trees could be cut down and space made for the mill. But there was no water. So this site was chosen. After a little thought, I was able to create a little creek in front of the mill for the water from the wheel to drain into to make the mill a better fit.
Unfortunately, this location did not allow for the mill to be serviced by the railroad like Ben King's original model was. However, I made a little road from the mill to the town of Cass and placed a wagon outside the mill to be loaded.
The chosen corner. The little cabin will have to go...
The hillside has been cleared and part of the hillside has been excavated. A wagon road has also been carved toward the left.
The overall completed scene.
Another wagon road was created further along coming out of the forest. This road helped connect the little town of Cass with the sawmill, which is a stone's throw away. Truth be told, I don't have many grade crossings (railway crossings) on the layout. Creating this little road gives me a reason to blow the whistle a bit more.
To help with the illusion that the railroad is the connector of towns and people, the roads don't link to the other towns on the layout.
The scenery went faster than I expected and was mostly completed over two work sessions. The little hillside all along the backdrop was re-grassed using static grass, the trees were replanted. I weeded out the poorly built trees as I didn't need as many now the Mill was taking up some ground.
It has been summer here in New Zealand and I've enjoyed the wildflowers on our families travels. I decided to model some wildflowers in this scene using the Woodland Scenics product. I've mainly used red, orange and yellow flowers in the long grass to bring a little colour.
The road to Maastrecht's Mill. The creekbed is visible to the right of the tracks. The photo was taken before the resin water was poured.
Overall I'm pleased with how the model fits into the scene. All that is left to do now is to connect up the water wheel to the power.
Ever since I was eight years old I've admired the work of Ben King who spent many years building his small Timber City and North Western Railroad. Ben's gift was detailing and scratchbuilding, the few structures on his layout were beautifully conceived and constructed. He wrote several articles for Model Railroader over the years, including several documenting the building of these structures. The articles included his plans.
The May 1994 issue of Model Railroad had an article by Ben King on building Weimer's grist mill. I was taken with this model and always wanted to have a crack at building it one day. Alas, I've not had the patience to give it whirl.
A while back I came across the MakeCNC website which was selling plans for CNC routers. They had a plan for Heim's Mill. I pulled out the article from 1994, sure enough, the two structures were very close and the CNC plans clearly used Ben King's plans as the base for their model.
I found a CNC kit maker in New Zealand who was producing kits using these plans and purchased a kit for NZ$20. The kit used 1mm plywood, so some of the details are a bit thick. But I've found they work nicely as when painted and weathered and are not placed to close to the layout edge.
I made the kit up about a year ago but I could not decide on a location for it on the layout. It was clear that if it was going to go on the layout, I was going to have to do some scenery surgery. I'll post on the integration with the layout another day. However, I knew that if I was going to put the mill on the layout, I had to animate the water wheel.
Water wheels turn slowly, so I needed a motor with a gearbox to provide that nice slow turning motion. I turned to AliExpress and found this very reasonably priced motor with a built-in gearbox. It turned out to be a great choice.
The small motor and gearbox from AliExpress
After drilling a hole for the wheel shaft I made a mount for the motor and simply glued it into place inside the mill. The video shows a test of the wheel and motor inside the model.
Ben King called his structure Wiemer's Mill, but what to call to mine? I've settled Maastrecht's Mill. Maastrecht was my Mother's maiden name, so its named after my Nana and Oupa. To my knowledge, we did not have any millers in the family but never mind. I have a tradition of naming places and businesses on the layout after family and friends. Moreover, my Nana Maastrecht was the one who introduced me to trains, building my first layout for me when I was three years old. Given that, I think it's fitting that a structure I've admired for so long is named after her. Anyway, I think the name has a nice ring to it.
The next step is to install the mill on the layout. I'm going to have to make space...
Erewhon is the fiddle yard and interchange with the outside world and because of the limited space on this section of the layout, there is not much room for structures. However, there is a two stall engine house, and turntable. I am still working on a small passenger station.
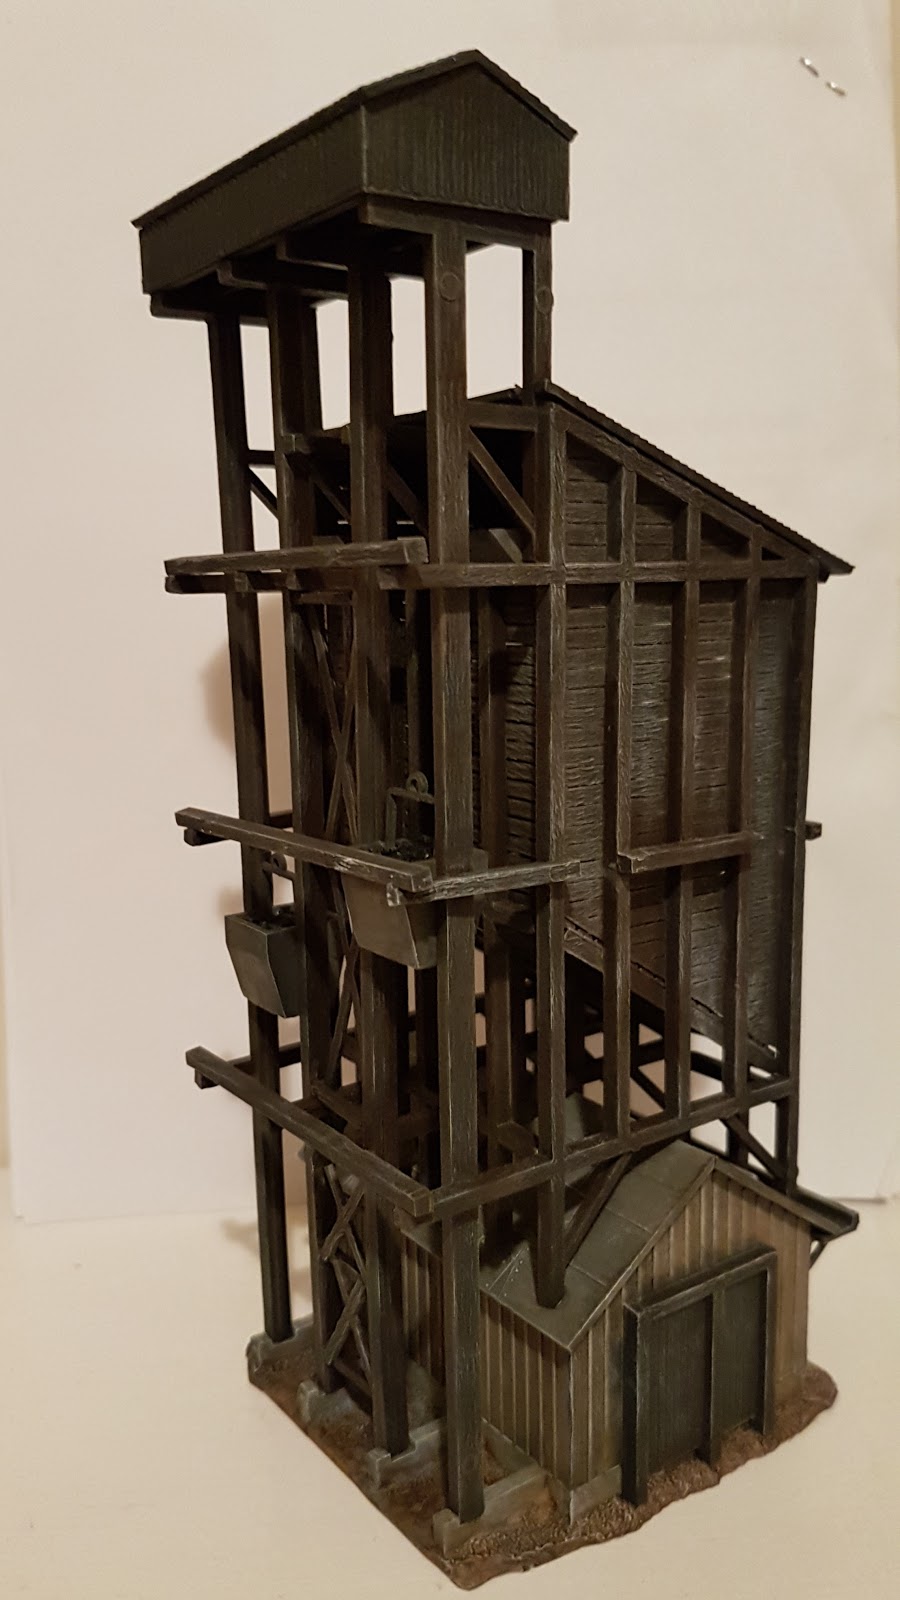
A couple of weeks ago I completed a coaling tower kit that I picked up on TradeMe for $25. It is an old model power kit which, like it says on the box, went together really nicely.
I didn't paint the kit, but did give it a dirty wash and dry brush with Humbrol paints. This gives the structure a suitable weathered look and the dry brushing brings out some of the details. I cut away most of the base and painted what remained with earth coloured craft paints.
Because Erewhon is a snow scene, the structure needed a covering of snow. I used the woodland scenics soft flake snow and stuck it in place with a combination of PVA glue and hairspray.
I made a space for it on the layout, sprinkled some more snow around and also spread some crushed up coal on the ground and over the tracks. I glued this all down with the tried and true method of 50:50 water/PVA glue; being sure to spray the materials with 'wet' water prior to applying the glue.
I'm a bit sad that because of where the structure is sited, viewers cannot see the other side of the structure with the coal buckets. I also have not modeled the service track to the coal buckets where a gondola would dump the coal. Again, there is not really any space behind the coaling tower or for such a track to meaningfully connected to the rest of the fiddle yard.
However, at this point I'm happy with the compromise. The tower, along with the engine house, gives an impression that Erewhon is of some importance, even if there is no space to model much else. Perhaps in a future layout it can be incorporated where viewers may see more of the structure.
The coaling tower installed on location in Erewhon
Looking across the fiddle yard in Erewhon toward the coaling tower. Erewhon station is at far right.