Sunday 22 December 2019

December photos and YouTube Video

I haven't updated my blog in quite a while. My work got exceptionally busy during August and time has been quite precious. When I have found a few moments, I've simply enjoyed running trains. Honestly, the current keepers and decoders in these locomotives make driving them so much fun.

Everything in New Zealand typically shuts down for a couple of weeks over Christmas and so I've enjoyed the first couple of days of my holiday tinkering on the layout, making a video and taking some photos.

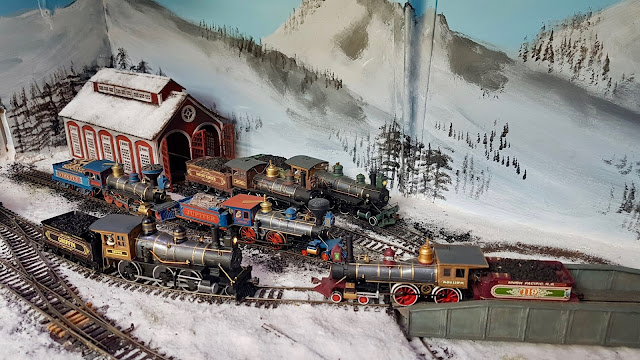
One of my readers, Alex, requested a shot of Jupiter in the snow at Erewhon. I hope this photo was what you were after Alex.
Jupiter in Erewhon

More Jupiter


Firefly leaves Cass


119 heading toward the cut

Mountaineer at Teresaton. The fence on the left is new. More about that later.


I also spent a little time creating a video of Griffin pulling out with a heavy train on frosty rails. I love hearing steam locomotives struggling for grip, but there isn't really a way to capture this in our modelling. The Tsunami 2 decoders do have a wheel slip sound effect, which sounds great. But of course, it cannot simulate actual wheel slip. That is a function physics, and we spend a lot of time weighting our models to eliminate wheel-slip!

I set up a scene with Griffin and a few cars. Another locomotive was attached to the rear of the train to provide some resistance. I used the second locomotive, which was muted, to control the actual train speed. I used the switching mode function on Griffin, which overrides the momentum feature. This meant Griffin could strain away at the head of the train, slipping her drivers and creating a good show.

Unfortunately, I accidentally uploaded the raw footage instead of the finished video, so I deleted it and have uploaded it again. My apologies to those who left comments on the original video, they were deleted when I removed it. I hope the final product is a more interesting watch!


Saturday 3 August 2019

Imagine all the people (with apologies to the Beatles)

I mentioned in my "what's the intent?" post that I think people are the reason railroads exist. In 1895  people were much more connected to rail transport than they are today. The train was 'the' way you travelled any long distance. If you were going on holiday, travelling for business or shipping goods, you used the train. One way I've tried to capture this aspect of turn of the century life is by populating the layout with figures and animals.

I'm really blessed that my father's hobby is painting wargaming miniatures, particularly from the American Civil War and Old West eras. Because of this, he very generously paints all manner of figures for my layout and I think he does a superb job.

Dad uses Humbrol matt paints almost exclusively and patiently hand paints each figure. He works in batches, painting various figures in stages, working through the flesh colours, then various parts of the clothing. His hand is far steadier and more accurate than mine, allowing him to add fine details like check shirts, flowers in headdresses and in some cases, even pupils in the figure's eyes.

A pack track from Musket Miniatures Rustic Rails line.

A mixture of Blue Moon, Knuckleduster, AC Stadden and Musket Miniatures figures make up the inhabitants of Cass.


Figures and horses from Musket Miniatures work at the Teresaton livery stables.


Many store-bought, prepainted figures can appear flat and featureless. Dad uses a dry brushing technique to highlight details, bringing the figure to life. Dry brushing makes ruffles in a dress, cresses in a suit, buttons, or even individual fingers on a hand, far more apparent.

Dry brushing is also a really good way of adding dirt and dust to a figure, most people today, let alone in the Old West, don't look like they have just stepped out of a clothing shop.

By using matt paints, Dad also avoids the unrealistic sheen of many prepainted figures. At a distance, even shiny surfaces are not as glossy as they close up.  Our models are generally viewed from several hundred scale feet away, so it can be appropriate to tone the colour intensity and sheen down. Subsequently, Dad's figures fit naturally into the scenery.


TOC19 children by A C Stadden, outside Teresaton school.


A cougar stalks on the cliff tops. This was a 3D printed miniature from Shapeways.

Bank robbers encounter lawmen at a bank heist by Blue Moon Miniatures.
Over the last ten years, Dad has painted several different brands of turn of the century figures. The majority of my figures come from Musket Miniatures Rustic Rails product line. The business changed hands several years ago and unfortunately, the new owner has not continued to offer the rustic rails line on their website. I understand they acquired all the moulds, though I have not enquired as to if they plan to produce any.

I also have figures from Blue Moon miniatures. These are 15mm wargaming figures and are a little small for HO. However, interspersed with other brands, help vary the average height of the population.

AC Stadden makes several lines of fantastic Edwardian and Victorian civilian people in everyday and fancy dress. They are beautifully detailed and paint very well. They are quite fine, or slim, which also helps with the variety of body shapes in the population.

By far the most impressive figures we've seen are those on offer from Knuckleduster Miniatures. Sculptor Forrest Harris has made masters using 3D printing, which he uses to cast the lead-free pewter miniatures. The detail is finer than anything else we've seen in HO Scale figures.  Buckles, individual fingers, facial expressions, and eye details are just par for the course in Knuckledusters figures.
Musket Miniatures figure on the left, Knuckleduster on the right.

Two TOC19 figures by A C Stadden, with two Blue miniatures figures in the background.


The most recent census of the layout revealed there are 270 people on the layout. If you were to add all the cattle, horses, and wild animals like bison, elk, moose, skunks and coyotes, the final tally would easily be close to 350. Some may say this is too many. I have thought this myself at times. However, I believe it really gives the impression there are bustling towns and industries that need the railroad to survive.


Some modellers have a preference for figures or animals in at rest poses as opposed to active poses. The thinking is that figures in action poses are frozen in that position forever like some fairy tale nightmare and may appear unrealistic.

I don't mind the frozen action. I find it helps convey the story of what life was like in 1895. Visitors to the layout tend to be drawn in by the detail. Their intrigue shows they are quite accepting of the fact they are frozen in time, they have fun looking for the story in the scene.

Wagon teamsters by Knuckleduster Miniatures.
Thanks, Dad for making such a huge contribution to the layout. Truly, without the figures, I believe the layout would not have the impact or the interest it does.


ManufacturerNumber
AC Stadden54
Preiser14
Bachmann13
Knuckleduster36
Blue Moon57
Musket Miniatures93
Other3
270


Saturday 15 June 2019

Roadworks

As part of a prior post on the Maastrecht's Mill project, I explained how I added several dirt roads around the sawmill and town of Cass.

One road runs perpendicular to the railroad, past the sawmill and disappears into the forested backdrop. I tried to paint the road with some single point perspective to it, so it appears the road has some distance to it. This was partially aided by blending the rock cutting on the layout into the backdrop.

I'm not an artist, but I'm happy with the effect as a first attempt.


A stacked photo looking down the road. A small wagon train is making its way into town. The two fellas driving the green wagon are from Knuckleduster miniatures. 

The road also extends around and into the town of Cass. I used a darker brown colour to give the feel of damp earth. I wanted it to feel like it had rained not so long ago and the road is a but muddy. I may yet add some puddles by brushing on some gloss medium in low laying areas.


Saturday 8 June 2019

Improving Bachmann's old time cars

The turn of the century modeller is not spoilt for choice when it comes to ready to run locomotives or rolling stock models.

There are a number of very nice kits made by manufacturer's specialising in turn of the century equipment. However, I do not own any of them. One-third of my rolling stock is made up of Bachmann old time cars. When I started out in turn of the century modelling all I had was four Bachmann old-time freight cars and three passenger cars. I was able to find more of these 34' freight cars for sale second hand to grow my rolling stock fleet. Most cost between NZ$8-12  per car.


Thoroughfare Gap Railroad
Rolling stock by manufacturer
ManufacturerNumber of each%
Bachmann1733%
Frateschi12%
IHC918%
Kitbash12%
Mantua714%
MDC24%
Roundhouse1020%
Scratchbuilt48%
Grand Total51100%

Most of the Bachmann freight cars are flat cars or gondolas and the detailing is more toy-like. Even so, a little weathering goes a long way in making these cars look better. Over time, I've painted and weathered the decks to look like grey weathered wood and some added custom decals.

To get the cars to run reliably, I replaced the thickly moulded trucks with Walthers proto arch-bar trucks and wheelsets. In doing so I also body mounted the couplers.  I find body mounted couplers much less likely to derail when shoving a string a of cars while switching.

Even after all these improvements, the height of the cars has still bothered me. The car body itself is quite thick as it accommodates a metal plate to give the car enough weight to track well. In addition to this, the cars bolsters are quite high, meaning the car body sits high on the trucks. All this means these cars are obviously taller when sitting next to other cars on the layout.

I decided to try lowering these cars and I'm quite pleased with the results. I filed down the bolsters leaving enough clearance for the trucks and wheelsets to pivot over rough track. I also removed the metal weight. This allowed the plastic shell to fit slightly lower over the plastic underbody.

Bachmann Old-time gondolas, the lowered car is on left, original on the right. Side by side, the height difference is very noticeable. The plastic stirrups have been cut off to be replaced by metal ones. 

The only problem now was the lack of weight. I cut out a section of the plastic underbody frame and filled it with lead shot until the cars achieved the desired weight. The lead shot was glued in place with PVA glue.

So far, I've lowered two of these cars, but they appear to be tracking around the layout just fine. I'll be slowly working my way through the roster.


Sunday 2 June 2019

Blog housekeeping

I've been going through old posts and updating the labels for each post to make them easier to find. Unfortunately, when I've done this I appear to have updated each post, rather than simply saving the changes.

If you follow by email, I fear Blogger may have sent you an email for each of these old posts I have updated. My apologies for the confusion.

On the other hand, it may be a great way to see rerun some old content.

Thanks for your patience.

Bachmann 4-4-0 new tooling repainted

I ordered two of the new bachmann 4-4-0 with sound at the beginning of the year. I was keen to have a reasonably accurate model of the Union Pacific's 119 but felt the wine colour of the model was too brown for my taste. I ordered a 119 model and I've now completed a new paint and decaling job and I'm quite happy with the results.

A big thanks to John Ott for making his decals available on his website, http://www.ottgallery.com I modified his decals to fit my bachmann model. John based his decals on the colour scheme researched by Jim Wilke and Jon Davis, which you can find at http://discussion.cprr.net/2008/02/jupiter-119-paint-colors.html

I followed the rendering by Jon Davis to come up with the overall paint scheme.


Stock loading ramps

Both the towns I have modelled on my layout have stock pens. Shipping livestock is a big part of the business on the thoroughfare gap railroad.

Each town has a trackside corral though, neither had a way of loading the livestock on and off the trains. I've been meaning to make up some loading ramps for several years now but somehow, I've never got around to it.

Recently I discovered a seller on Trade me, the NZ version of eBay, selling some stock loading ramps as 3d printed kits. I purchased four and the went together really easily.
After a little paint and some weathering with soft pastels, they were ready for the layout.

The corral at Cass and the two loading ramps in position. It's great to finally have these little details to complete the scene.

Running the kitbashed 2-6-0

In my earlier post about my kitbashed 2-6-0 I promised I'd 'do a video of it someday'. I've finally got around to making one and posting it to my YouTube channel. You can watch it below.


I've experimented using a voiceover to explain some aspects of the project, which is a departure from my previous subtitle only videos.

Saturday 1 June 2019

Derailments

Recently, I had the privilege of a visit from some fellow model railway enthusiasts. Before my guests arrived I cleaned the tracks, made up several trains and test drove them around the layout to ensure everything was working properly. When my visitors arrived, we started running the trains around the layout. Unfortunately, every train that ran encountered at least one derailment in its passage over the layout. While it didn't dampen my visitor's spirits, I was disappointed the layout ran so poorly. I decided to take steps to minimize further derailments. Firstly I resolved to troubleshoot derailments when they occur. Upon reflection, when I am running trains by myself, I’ve tolerated small derailments because I don't want to interrupt my operating session. I think this lead to a mental bias that the layout actually was running better than it actually was. I’ve accepted that my operating sessions will be interrupted for now. But it will be so I can enjoy more trouble free running in the future. If I can’t resolve a derailment at the time, I will document it, the locomotives and cars involved and work on it at a later date.

Sometimes derailments are easily rerailed in the moment. But stopping to troubleshoot the problem should reduce problems in the future. 

Troubleshooting invariably requires some patience and observation as to what is occurring at the site of a derailment. I've found an HO standards gauge is indispensable when diagnosing problems. By studying my derailments more closely, I could see that most of the cars involved were using Kadee metal wheelsets with plastic axles. About half my rolling stock was equipped with Kadee’s and half with Walthers Proto 33” wheelsets. The Walthers wheelsets are all metal, including the axles. I had found that on my trackwork, the Walthers wheelsets ran smoother and the cars rolled more freely than the Kadee wheelsets. So I decided to standardise and purchased more Walthers Proto 33” wheelsets for the rest of the fleet. Since installing the new wheelsets I’ve seen a dramatic drop in the number of rolling stock derailments. I’m not saying the Walthers wheelsets are better outright, they just appear to work better with my track, which I concede is a bit rough in places. One resource I have found helpful is Joe Fugate’s Make it run like a Dream series. So far Joe has released two books, available in print or ebook, and is working on the third concerning locomotives. Joe shares a multitude of insights and tips to help attain trouble-free running. You can find Joe's books for sale at the Model Railroad Hobbyist store.


Friday 24 May 2019

Passenger cars, combines, decals and kitbashing...

I have six passenger cars on my layout, including three coaches, two combines and one baggage car. Four are finished in green, and one coach and one combine are finished in red.

I have been wanting to create decals for the red cars to depict the ornate Victorian guilt designs common at this time. So I spent some evenings on the computer and came up with the mocked up design below.

A Photoshop mock-up of the decals overlaid on the coach body.

A photoshop impression of a kitbashed baggage car.
I really like the look of the mock-up so will probably proceed with printing some decals for the coach. However, I don't know if a combine would be so intricately detailed. To me, combines are a practical compromise used on smaller trains. My railroad is a small railroad, but if I used baggage cars, I wonder if it would portray my line as busier and more important, further reinforcing the crucial role railroads played at this time?

So I'm tossing up whether to decorate the combine more modestly, or cut both my combines in half and cement the two baggage and coach sides together, turning the two combines into a coach and a baggage car.
One of the potential donor combines

 On one hand, two ornate red coaches would make a nice special train, which would pair nicely with a red baggage car if required. Doing this would enable me to run two passenger trains with three cars each (one baggage, two coaches) at once.

On the other hand, combines are useful for small local trains, but do I need two? I'm not sure. Kitbashing the two combines could sure be a fun project.

What do you think? I'm keen to hear your opinion on the artwork and the merits of baggage cars vs combines.

Friday 10 May 2019

May 10 2019 - Sesquicentennial of the Transcontinental Railroad's Golden Spike


What was it the Engines said,
Pilots touching,--head to head
Facing on the single track,
Half a world behind each back?

From Opening of the Pacific Railroad by Francis Bret Harte

Today marks 150 years since the "wedding of the rails" when the Central Pacific Railroad and the Union Pacific Railroad were officially joined at Promontory Summit in Utah. At exactly 12:47 pm, the last iron spike was driven, finally completing the line. It was an event that marked a new era in long-distance overland travel. It is also the event that helped draw me to model early American railroads.

As a kid, I had a recording of Ludovic Kennedy's documentary Coast to Coast, which featured a short re-enactment sequence with the two replica locomotives at Promontory Summit. Apart from Disney's the Great Locomotive Chase, this was the only footage I had of trains from this era, so I watched and rewatched this sequence many times over. Even though it's old, I still get a kick from watching this again.


The words inscribed on the fourth side of the spike, May God continue the unity of our Country, as this Railroad unites the two great Oceans of the world, were fitting for the occasion. The concept of the overland railroad had been debated by congress and explored for many years. But, when Abraham Lincoln signed the Pacific Railroad Act in 1862, America was embroiled in the Civil War. Establishing a reliable overland link was seen as an important move to strengthen the Union's ties with the western states, particularly California, which was struggling with the idea of secession.

If you are keen to find out a bit more about the Golden Spike and the famous locomotives, I recommend you watch the following videos from ToyManTelevision's channel on YouTube. I have also included a link to the original documentary about how they built the replica locomotives that reside at Promontory today. Enjoy them if you watch.


Sunday 21 April 2019

Tender wrappers and headlights


When I was installing the Tsunami 2 sound decoders, I made some adjustments to Jupiter and Firefly.

Jupiter was the only engine to keep her factory paint job (except for her boiler jacket). The artwork on her tender was not very detailed and I decided to replace it with artwork based on John Ott's locomotive fine art prints. I arranged the artwork in a 'tender wrapper'.  A single long piece of paper that would wrap around the Jupiter's tender and be trimmed to fit.

I tried printing the artwork on decal paper, following the same techniques I've used on all my previous tender artwork. However, I was not happy with the colour matching and ended up printing the wrapper onto plain copier paper. As this was all one piece and it followed the outline of the tender it fitted in inconspicuously.

Below are before and after photos of the Jupiter. There is alot more detail in the new artwork, the filigree is more intricate and the guilt shines brighter.

Research conducted by John and other locomotive historians seems to indicate the Jupiter had either a plain varnished wood cab or the cab was painted to represent varnished wood, with artificial wood grain painted on, which was apparently, a fashion trend at the time. The pilot and sand domes were possibly also red. At some stage it is likely I change these details on my model but for now I'm enjoying the new tender artwork.
Jupiter with her original tender artwork as delivered from the manufacturer (Though, the boiler is painted in this photo.)

Jupiter wearing her new tender wrapper, based on John Ott's artwork.

Firefly was my first kitbashed locomotive. It was also the first I repainted and made custom decals for and it shows a bit in the final finish. When I did the original kitbash I did not add a lighted headlight. Instead I painted the inside of the light silver to represent the reflector. The headlight also did not have a lens.

The headlights used in 1895 are oil lamps, which would burn whale oil or something similar. This was expensive and therefore railroads would only light the headlights for night running. Even though my trains don't run at night, I found I enjoy running with lights on, as I feel it adds some life to the locomotive. I justify their use due to the many tunnels on my layout. 

When I added the Tsunami 2 to Firefly, I decided to finish the job properly and add an LED to the headlight. I also made a lens for the housing using acetate. 

I liked the original sunflower style stack that came with the original IHC locomotive shell, but I always felt it was a bit thick looking. In any case it had to be removed to access the headlight and when I reassembled the locomotive I tried out a Congdon and diamond stack for looks. In the end I settled on the diamond stack. 

Firefly with her original sunflower stack and dummy headlight.

Test fitting the Congdon stack. 

Firefly fitted with her functioning headlight and diamond stack.

When I get around to it, I'll find a good plastic friendly paint stripper and remove the paintwork on Firefly's cab and tender and start again. I'll definitely redo the tender artwork and use a similar method to what I used for the Jupiter.

I'm interested to hear which stack you prefer on the Firefly, the Sunflower, Congdon or Diamond? If you can suggest any good plastic friendly paint strippers I'd love to know.


Sunday 17 March 2019

Installing Maastrecht's Mill and some roads.

The problem with Maastrecht's Mill is that there was not a space for it on the layout. Logically, it would fit best near water. The only place with running water on the layout is in the Canyon, but the scenery is arider. Not the place you expect to find a flour mill.

The most logical spot was the corner of the layout near Cass and the Sawmill. There was a little wooded hill that rises into the backdrop. Trees could be cut down and space made for the mill. But there was no water. So this site was chosen. After a little thought, I was able to create a little creek in front of the mill for the water from the wheel to drain into to make the mill a better fit.

Unfortunately, this location did not allow for the mill to be serviced by the railroad like Ben King's original model was. However, I made a little road from the mill to the town of Cass and placed a wagon outside the mill to be loaded.

The chosen corner. The little cabin will have to go...
The hillside has been cleared and part of the hillside has been excavated. A wagon road has also been carved toward the left.
The overall completed scene.

Another wagon road was created further along coming out of the forest. This road helped connect the little town of Cass with the sawmill, which is a stone's throw away. Truth be told, I don't have many grade crossings (railway crossings) on the layout. Creating this little road gives me a reason to blow the whistle a bit more.

To help with the illusion that the railroad is the connector of towns and people, the roads don't link to the other towns on the layout.

The scenery went faster than I expected and was mostly completed over two work sessions. The little hillside all along the backdrop was re-grassed using static grass, the trees were replanted. I weeded out the poorly built trees as I didn't need as many now the Mill was taking up some ground.

It has been summer here in New Zealand and I've enjoyed the wildflowers on our families travels. I decided to model some wildflowers in this scene using the Woodland Scenics product. I've mainly used red, orange and yellow flowers in the long grass to bring a little colour.

The road to Maastrecht's Mill. The creekbed is visible to the right of the tracks. The photo was taken before the resin water was poured.
Overall I'm pleased with how the model fits into the scene. All that is left to do now is to connect up the water wheel to the power.

Sunday 3 March 2019

The dangers of getting new locomotives...

The problem with getting new stuff is your old stuff starts to feel old. Favourite items, having been usurped by a newer item, are used less and less. This is exactly where I found myself after I finished kitbashing my 2-6-0. Very quickly it became my go-to locomotive, which is understandable for a time, after all, it was new; new stuff tends to have a novelty value. However, it slowly dawned on me that I was enjoying this new locomotive because of the Tsunami 2 decoder and the Current Keeper.

My locomotives were either sound value models, with a very cut down version of a Tsunami decoder, or had a first generation Soundtraxx sound decoder that was shipped with the Bachmann 4-6-0 and 4-4-0 Spectrum sound onboard models; a very good decoder, but with some limits.

Thoroughfare Gap Railroad's full fleet. Because its a rare occasion for all the locomotives to be in one location, the company photographer scaled the imposing cliffs outside of Erewhon to take this elevated shot.
Shortly before Christmas, I made the fateful decision to commit to upgrading the remaining five locomotives in my fleet to Tsunami 2 decoders. I knew I would get Current Keepers in the two Bachmann Spectrum locomotives. But I was resigned to continuing to put up with occasional stalls on dirty track and insulated frogs for the two new Bachmann 4-4-0's and the kitbashed 2-8-0. Their small tender sizes probably precluding the installation of a Current Keeper.

I thought I'd knock off the two Spectrum's first. While I was fitting up the first Spectrum, I decided to see if I could fit a current keeper in the new tooling 4-4-0. I was pleasantly surprised that it was a very close thing! I ground out some of the tender shell to create some more clearance using a motor tool, and presto, the current keeper could fit!

Now the cost of my project had just escalated by three current keepers, for I knew I could squeeze them into the other two small locomotives. But the final result was going to be worth it.

I've now finished the upgrades and the whole fleet is using Tsunami 2's with Current Keepers. I spend less time cleaning tracks, though I know it still needs a good clean from time to time. I certainly am not tapping stalled locomotives in frustration anymore.

The lift in enjoyment from the smooth and easy running the Current Keepers provide is a real game changer. Years ago, MRC ran an advertisement encouraging modelers to consider buying one of their power packs instead of a new locomotive to increase enjoyment of the hobby. I feel like Soundtraxx could run the same advert with their Current Keeper. Having a locomotive with a Current Keeper is like having a new locomotive!

So in summary, you can argue the true cost of the 2-6-0 mogul project was the mogul locomotive PLUS six Tsunami 2's and six Current Keepers! Be careful when you embark on new projects, you never know what else you may end up purchasing as a result. Though in this case, I have no regrets.

I'll post another day about how I've configured my Tsunami 2's and some of the great features that drew me to this decoder. I'll also make a post about the Current Keeper, its pros and cons and the drawbacks.


Monday 4 February 2019

Animating Maastrecht's Mill

Ever since I was eight years old I've admired the work of Ben King who spent many years building his small Timber City and North Western  Railroad. Ben's gift was detailing and scratchbuilding, the few structures on his layout were beautifully conceived and constructed. He wrote several articles for Model Railroader over the years, including several documenting the building of these structures. The articles included his plans.

The May 1994 issue of Model Railroad had an article by Ben King on building Weimer's grist mill. I was taken with this model and always wanted to have a crack at building it one day. Alas, I've not had the patience to give it whirl.

A while back I came across the MakeCNC website which was selling plans for CNC routers. They had a plan for Heim's Mill. I pulled out the article from 1994, sure enough, the two structures were very close and the CNC plans clearly used Ben King's plans as the base for their model.

I found a CNC kit maker in New Zealand who was producing kits using these plans and purchased a kit for NZ$20. The kit used 1mm plywood, so some of the details are a bit thick. But I've found they work nicely as when painted and weathered and are not placed to close to the layout edge.

I made the kit up about a year ago but I could not decide on a location for it on the layout. It was clear that if it was going to go on the layout, I was going to have to do some scenery surgery. I'll post on the integration with the layout another day. However, I knew that if I was going to put the mill on the layout, I had to animate the water wheel.

Water wheels turn slowly, so I needed a motor with a gearbox to provide that nice slow turning motion. I turned to AliExpress and found this very reasonably priced motor with a built-in gearbox.  It turned out to be a great choice.
The small motor and gearbox from AliExpress

After drilling a hole for the wheel shaft I made a mount for the motor and simply glued it into place inside the mill. The video shows a test of the wheel and motor inside the model.

Ben King called his structure Wiemer's Mill, but what to call to mine? I've settled Maastrecht's Mill. Maastrecht was my Mother's maiden name, so its named after my Nana and Oupa. To my knowledge, we did not have any millers in the family but never mind. I have a tradition of naming places and businesses on the layout after family and friends. Moreover, my Nana Maastrecht was the one who introduced me to trains, building my first layout for me when I was three years old. Given that, I think it's fitting that a structure I've admired for so long is named after her. Anyway, I think the name has a nice ring to it.

The next step is to install the mill on the layout. I'm going to have to make space...


Thursday 10 January 2019

Wagon's ho!

Several years ago, I acquired a 1:72 (OO) scale kit by Imex containing two covered wagons. Most of the parts were close enough in proportions to 1:87 (HO) scale. Unfortunately, the wheels of the wagon were too large and I wasn't taken with the animals or the people. So the kit was put in a drawer for another day.


Recently,  my Father ordered me a set of seated wagon figures from Knuckleduster miniatures, which he painted beautifully for me. Knuckleduster's HO figures really have an unprecedented level of detail and I'm really enjoying adding their line to my layout.

When Dad gave me the seated wagon figures, I knew I needed to find a solution for that wagon kit.

The front wheels from the kit were the right size for rear wheels but that still left front wheels and horses to find. Interestingly, in my searching, I found that no one seems to make miniatures of harnessed horses.

Häkan Nilson, another period modeller (Shapeways shop eight wheeler models), has designed a number of 3d printed components and made them available for purchase on Shapeways. I ordered his harnessed horses and found a selection of wagon wheels from another Shapeways shop.

I found Shapeways to be quite expensive by the time you ship the items to New Zealand. However, I could not find many alternatives.

My Dad painted the horses for me over Christmas. He also added manes to the horses using modelling putty. I assembled and painted the wagon kits when we got back from our holiday.


These wagons do look larger than the other wagons on the layout, which are made by Musket Miniatures. But I believe those models to be slightly on the small side.

Overall, I'm pleased with the results and will look to place them closer to the front of the layout so the viewer can see the detail in the figures. By placing the smaller Musket Miniature wagons further back in the scene I may be able to achieve a bit of 'forced perspective' to add some perceived depth to the scene.