Friday 29 September 2023

Turntable build part 2

I wasn't sure about the best way to model the edge of the turntable pit wall and had thought about printing out a stone or brick pattern and lining the edge with it. But I decided I wanted something with more texture so I tried carving stone work into DAS air dry modelling clay. The results were lacking, but perhaps with some practice, I could make it work. But I tried carving, or rather scoring, some extruded foam. I was quite happy with the look. To paint it, I started by painting individual bricks either grey, raw or burnt sienna or raw number, which looked awful at first. I then dry-brushed white over all the stones, which tied everything together a bit more. But the final black wash toned everything down and gave a cohesive look to the masonry, as well as providing shadows in the mortar lines. 

To make the pit rail I began by measuring the length of rail I'd need and cut a piece of flex track half that length, then cut the ties in half, so I had two halves of the pit rail. I slowly bent these to shape by hand and used a steel weight as a jig. I kept checking the curve against a circle drawn with a compass to make sure I had the right profile. Once it was close enough, I glued the rail and ties down and ran wires to the main layout bus. 

Then it was a battle of slowly aligning the approach tracks. I worked with one track at a time, leaving a little extra length, that I trimmed once the glue had set. Before I begin the scenery at large, I will paint all the rails and ties. 

The turntable is reasonably short for my biggest locomotives like the 4-6-0. Overshoot tracks will be needed opposite all approach tracks and a real-life crew may have fun trying to balance the table with a larger engine. However, I was aiming to depict a turntable that was possibly struggling to keep up with the development in locomotive technology. With new locomotives getting bigger rapidly railroads were constantly having to update infrastructure to cope. 

The painted foam stonework glued in place. 

The bridge in place. The girders are glued in place. Decking and details to come.

An overall view of the turntable and the approach tracks glued down. The two tracks at the left have screws temporarily keeping the track in place while the glue sets. 


Friday 15 September 2023

Locomotive bell and whistle cords

This is a post I drafted last year, which, for some reason, I never published at the time:

Sometimes it's hard to know whether or not to model things like wires, or rope. From a scale perspective, often rope and wire will end up being larger than scale. At the same time, often when your mind expects to see the detail or wire or rope in a certain spot, it can look strange if it is missing. 

When completing some warbird aeroplane models with my son, we added the radio wires. I was really happy with how they finished off the models and I think they photograph better than they do without them. This got me thinking about such features on my layout, the obvious candidates being bell and whistle cords on the locomotives. I've also been keen to model a single telegraph wire along the line between stations for Morse code. But that's a project for another day.

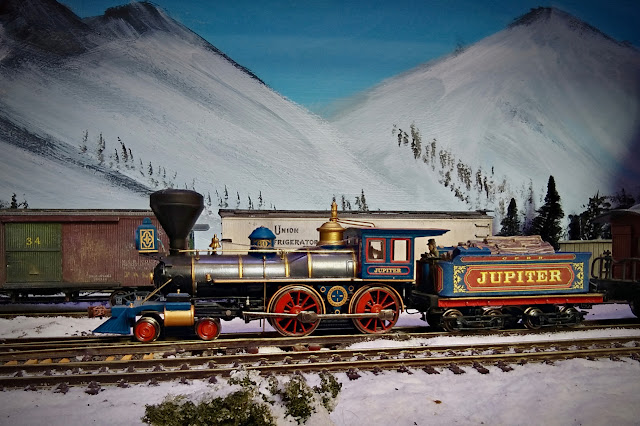
As an experiment during my upgrades of the Jupiter, I added a bell cord and a metal whistle lever. I was pleased with the results and decided these details to the rest of the roster. 

I used the same method as I did for the radio wires on the planes, using simple grey cotton thread for the cord. However, as it comes, the cord is not stiff enough and does not have a realistic sag to it to emulate the way a full-scale cord would hang. 

However, if you run the cotton between a bit of PVA glue on your fingers it stiffens the thread up. While the thread is drying, attach a clothes peg to the bottom of the thread and hang it to dry.  This keeps it nice and straight. Afterwards, it won't curl when you cut to length and will be stiff. 

I cut the thread into lengths long enough to have a realistic sag to it and then attached them to the models. The thread now could be bent to the shape of a saving bell or whistle cord.

Overall, I'm quite happy with the results.

A 1/72 Scale Junkers JU88 I made up with my son, featuring a radio aerial wire, which gave the idea for using the same method for bell and whistle cords.


The bell cord and whistle lever are visible in this photo of the Jupiter, taken on the old Thoroughfare Gap layout.


Friday 1 September 2023

Joining modules

Aligning layout modules seems to be a pretty important thing if you want trains to be derailment-free across the joins. I started by joining the modules together using 8mm bolts and T-nuts in the module faceplates. The T-nuts on one end of each module have the threads drilled out so the bolt tightens the two modules up against each other. I'd thought that this would be accurate enough, but I noticed after taking two of the modules apart that there was a tiny little bit of play. I managed to line things up manually and then tighten the bolts. But I think I will drill some holes and add some alignment dowels to help in the future. It is not like I'm pulling the layout apart a lot. It's a home layout designed to move instead of a dedicated show layout that moves all the time.  

The other thing about the 8mm joining bolts is that each T-nut is part of the wiring bus, having a positive or negative bus wire soldered to it. So when the bolts are in place, they carry the power between the modules, meaning I don't have to worry about wires hanging down or making other connections. 

To keep the rails aligned, I've also glued small brass plates at the end of each module and soldered the rails to them. I've seen people use PCB for this purpose, but I don't have access to a reasonably priced supply, so I used brass sheet, of course making sure I cut the plate in half after soldering and glueing to prevent short circuits. So far this is working well. All my trains are crossing all the module joins nicely and smoothly. Hopefully, once the rail and ties are painted and ballasted the plates should blend in much better than they do right now.

Brass end plates where the modules meet.