Friday, 31 October 2025

Meeting in the middle

The bulk of the trackwork for the new modules is now in place. I'd spent a lot of time trying to work various concepts for the layout of the town and trackage at the end of the line in my layout planning program, but nothing seemed to work out with everything I had been hoping for. 

Eventually, I gave up and just started mocking up ideas with the buildings and pieces of track directly on the modules. There was something to be said for this approach, as I figured out more easily how to make everything fit in a way that was visually pleasing and operationally made sense. Once I figured this out, I laid the majority of the track on these two end modules. This just left the four modules in between. 

My ideas of how to scenically fill this remaining space have also been evolving. It needed a passing siding with a spur to the sawmill, a tunnel, a decent bridge and ideally, a river canyon scene. I built the base module benchwork with sufficient depth below the track level to allow for lots of scenic potential. Once I decided on the general path of the track, I built the roadbed and laid the track. 

This seemed to take longer than it probably did in reality. But it felt great to finally join the track from the newly laid out town, with the rest of the track growing out from the existing modules. I'm still working on the wiring bus for the new modules to carry the power. 

One thing I'm mindful of is the layout's new location in a garage, which is more susceptible to temperature changes. The previous layout room was lined and insulated, and I had no trouble with the expansion and contraction of the track. However, I'm noticing a few issues with the onset of the warmer weather in our new location. While I will continue soldering my rail joins, I intend to cut expansion gaps in strategic places, which will require more feeder wires to be run. 

The last track join.

The box cars mark the location of the joining of the tracks. 


Saturday, 26 July 2025

Building the benchwork for the other modules

This year has been quite busy settling into my role in my new Parish. Spending time with family has also been important, as everyone is adapting to a new place to live. My son and I also did our first backcountry bike packing trip in July on the Heaphy Track. Preparing for this took quite a while, catching up on bike maintenance and sorting out our gear-carrying systems. But it was worth it for a good trip. 

I've still been chipping away at the benchwork for the remaining modules for the layout. I still have not finalised the track plan and may have to try roughly laying out the track and placing some of my buildings to get a better sense of the space. I think it's hard making the last modules (as opposed to the first), as you know everything you'd like to have on the layout, and in a sense, one is running out of room. I'll probably have to prune back my expectations of what can fit. 

My parents visited us recently, and my Dad helped me build the last couple of modules. He also painted the sky backdrop and the front of the fascia. Before they left, we managed to lift them all into place and join everything together. 

The layout space. A blank canvas on which to expand. 

After sourcing a few more connectors, I installed the LED lighting strip and connected it up to the existing modules, where the power source originates. Having light on all the benchwork is a huge help, as it's effectively the main source of light on the layout side of the garage. The U-shape of the layout is great at effectively blocking off the layout from the rest of the garage and creating an immersive effect. I also tidied up all scrap wood and equipment lying around the layout space (and in the other half of the garage too). I'm tracking in the right direction... slowly. 

Friday, 4 April 2025

Resetting up the modular layout

 I spent an afternoon reassembling the modules in my garage. I decided to screw the back of the modules to the wall. I started with the Roundhouse module. I set the track height to 125cm and then worked my way along the rest of the modules. By screwing them to the wall, I just had to put legs on the front. I braced each leg back to the wall as well so it's way more sturdy than the setup I had in Timaru. 

I added bolts to the bottom of the legs so I could fine-tune the height for levelling the tracks where the modules meet. After a little troubleshooting, the trains started running smoothly, even if the track only goes to the end of the fourth module presently. I'm still working on the track plan for the remaining modules but hopefully, I can start building the module benchwork soon. 


Friday, 21 March 2025

Decommissioning the original Thoroughfare Gap Railroad

I started building the original Thoroughfare Gap Railroad in 2008. It was a traditional tabletop layout, and the first I truly built myself. The track layout was inspired by Ron Hatch's Fulton County Narrow Gauge layout (HOn3) but had to be adapted for the HO scale. 

The times of this layout were really special. I experimented with different scenery techniques and found many things that worked and many that didn't. The biggest drawback I found in the end was the steep grades, which added plenty of scenic drama but limited the size of the trains I could run. When I expanded the layout, I enjoyed 'unfolding' the track plan and stretching it out along narrow modules with more scenery and less trackage. 

In many ways, I said 'goodbye' to this layout when we moved it from Gore to Timaru. I knew its days were numbered and it had served its purpose. I had a two-year reprieve while it served as the temporary terminus for the new modular layout. Even so, it was hard to let go of. I decided to salvage what I could of the bridges, all the points/switches and anything that could be removed easily. The rest was loaded on a trailer and taken to the local refuse station. Decommissioning a layout comes with a multitude of different feelings, sadness, regret, guilt, excitement and hope. Decision-making in the midst of this can be hard and I changed my position on things many times before I actually started pulling it apart. 

I'm sure if you've ever decommissioned a layout of your own or a family member's you may have encountered something similar. 


Looking bare again without buildings and people. 

I salvaged the bridges and wood structures. Perhaps I'll use part of them in the future. 

The remnant of the layout sitting at the bottom of the local refuse transfer station 


Friday, 14 March 2025

Moving the modules

So last year our time in Timaru came to an end. This is no surprise as it was only ever for the two years of my ministry training. The last few months saw the layout face the test it was designed for: dismantling, transporting and reestablishing in our new home in Christchurch (more about that another time). 

The dismantling part was easy. The lighting was unplugged, and the modules were uncoupled by removing the two bolts that connected each module together, which also undid the electrical connection between them. The temporary legs are also unbolted. They will be replaced with more substantial wooden legs.

The figures on the layout are glued in place with Mod Podge but the buildings were removed and packed in boxes. 

Each module was pleasantly light and easily manoeuvred by two people. I cut some plywood to cover the open sides. These cut pieces will get turned into the framing for new modules.

The original piece of the layout, which I built in Gore, was sadly decommissioned. It seems fitting to post about this separately later. 

The ravine module was the heaviest (unsurprisingly). Even so, two people could move without much effort.

The buildings came off, and were packed away separately, but the trees
and many of the figured stayed glued in place for the journey.

Ready for boxing...

Three of the modules are all encased in plywood. This made them very easy to transport.


Friday, 13 December 2024

Scenery in the Ravine Part 2

Somehow I missed taking some progress shots on this module. But here is where it's landed for now. I completed the static grassing and added many of the conifer trees from the old layout. I also added a couple of my redwood trees on the edge of the module as the next module to be built will introduce the redwood forest. 

The river is to have gravel and water added, and I plan to add some light foliage to the nooks and crannies on the gorge cliffs. Of course, the steel viaduct is still to be completed, but for now, the plywood bridge has been painted brown as a stand-in.  


Sunday, 8 December 2024

Stone Roundhouse Scratchbuild Part 6


This may be the last update for the roundhouse for a while, I'm pretty happy with where it ended up. 

I added some wooden flooring, scribed and weathered balsa. In time I'll rafters, framing and vertical roof supports and I hope to detail the interior. But for now, it's ok. I scratchbuilt doors using pre-scribed balsa sheet and added framing using cardstock. I made a card template and mass-produced these over several evenings. For now, they are just glued in place.

I also took a photo of the exterior of the roundhouse and duplicated it in Photoshop to make a continuous print that could be used as a stand-in for a back wall. Again, it is not a final solution, but more like a temporary stage prop to help the illusion. 

Lastly,  a temporary roof was made with cardstock and copier paper layered on to represent tar paper. 

The layout is being prepared for its ultimate test, being able to move. I'm very pleased to have the roundhouse project to this point prior to moving as it feels like a natural stopping point for this module. 


Friday, 29 November 2024

Modelling blurred aircraft propellers

When I model aircraft I typically always build them with their landing gear raised, as if in flight. The one drawback of this is that the propellers are always static in the display. When I take photos of the models I use a hair dryer to spin the props. This creates a great picture but doesn't look good displayed in a diorama. 

After searching the internet for different solutions, I found someone who had created some artwork of blurred propeller discs and made them available on a modelling forum. I got a good supply of these printed on clear acetate and then attached an exacto blade to a small drawing compass to cut them out accurately.

My son and I added one to his model of a RNZAF Corsair and the results look quite good. So we've decided to add them to a Mitsuibishi Zero he had completed previously. We're also completed a Hawker Typhoon model together with one of these discs as well. 

To display these models, I found artwork of relevant air combat scenes online. I usually had to clone out the main aircraft in the picture to be able to replace it with the model. I cut some 18mm boards slightly smaller than the picture and painted the back and edges black. Once this dried I glued the printed scene onto the board with Mod Podge and then trimmed the excess. Then it's a case of mounting the model to the board so it looks like it's part of the scene. These "photoboards" can hang on the wall like a picture. We've created two from the Pacific theatre, with the Corsair and the Zero. Even though they are different scenes they visually go together nicely. The Corsair flying into the scene on the left and the Zero flying out of it on the right create a nice parabola your eye naturally follows, drawing you through both dioramas. The Typhoon is sporting D-Day stripes and is displayed doing what it did best, diving in for a ground attack.


Friday, 22 November 2024

Stone Roundhouse Scratchbuild Part 5

With the stone roundhouse off the jig, it was time to test it on the layout. I'm happy with the colouring and how it compliments the backdrop colouring, looking like the stone was quarried locally. Next steps will be to glue it in place and add ground cover to blend it into the scene.

In terms of the interior, I plan to make a wooden floor. The few prototype photos I've been able to find show early roundhouses either had stone, dirt or wood floors. After reading about others experience with making service pits, I've decided not to add these. Though, one or two could be added at a later date when I spend more time on the interior. 

After gluing it down I will need to scratch build some doors and a temporary roof.


Friday, 15 November 2024

Static grass Part 1

This post shows the progress of adding static grass to the yard and town modules. I am using a mixture of Noch, Silfor and Woodland Scenics static grass. My static grass applicator was from AliExpress, and works really well. I haven't tested any of the more expensive models from Woodland Scenics and Noch, but I'm not sure that their results would necessarily justify the increased price. 

I particularly like the results of the patchy grass around the team and stockyard tracks, which are buried in the ground. The tufts don't interfer with the rolling stock and adds to the overall look of the scene. 


Friday, 8 November 2024

Stone Roundhouse Scratchbuild Part 4


Just a short update on the Stone Roundhouse project. I used the same 'leopard spot' technique that I use for painting rock casting to paint the roundhouse stones. I painted individual stones an assortment of earth colours and then blended them together with a earth tan wash. On a test section I first tried a raw sienna wash, but this turned out too yellow. The tan gave more of the colour I was looking for. I was sure to check out the colouring under the layout lighting at several stages to make sure that it would end up looking right on the layout.

After the paints were completely dry, I light dry brush with white brought out some highlights and dulled down any bits that seemed too bright. The next step it to remove it from the jig and install it on the layout.


Friday, 18 October 2024

Scenery in the Ravine Part 1

The last time I posted about the ravine scenery the rocks were all still plain white plaster. I painted these using the woodland scenic 'leopard spot' technique. Except, I just use cheap acrylic earth tone paints instead of the Woodland Scenics colours. I make up thin washes of each colour and spot them around, making sure to leave sufficient patches of plain plaster. Then this is all tied together with a wash of the colour that you want to use as your dominant colour. For this I used a black wash, yielding a dark grey colour. If any colours appear too intense I hit it with some wet water from a spray bottle.

These photos show the rock faces while they are still a bit damp. Once they are completely dry I'll dry brush the faces to bring out the highlights and help blend the different colours together. 


Friday, 4 October 2024

Stockyard fences part 2

With the fences repainted I installed these on the layout. The stockyard sits at the edge of the layout, allowing the viewer to look out of the yards to the loading of the stockcars. I drilled an appropriate-sized hole for the posts and simply inserted the fences into the ground. Later on, static grass will help blend the fences into the surrounding scenery.  The loading ramps are also salvaged from the previous layout. They were 3d printed by another New Zealand-based modeller. 


Friday, 20 September 2024

Stockyard fences

I'm still working on the roundhouse project but here's another small project that is on the go. 

One of the new modules needs a stockyard. I aim to have one at each end of the railroad. Most of the stockyard fences I salvaged from the old layout are fences made by Peco. They are flexible, and for some reason, possibly this same flexibility meant that the previous paint job was flaking. I gave them another undercoat of white and then brushed on a black wash. This gives a mottled grey, mimicking weathered wood. 

The next step will be to add this to the layout, which I'll post about later. 


Friday, 6 September 2024

Stone Roundhouse Scratchbuild Part 3

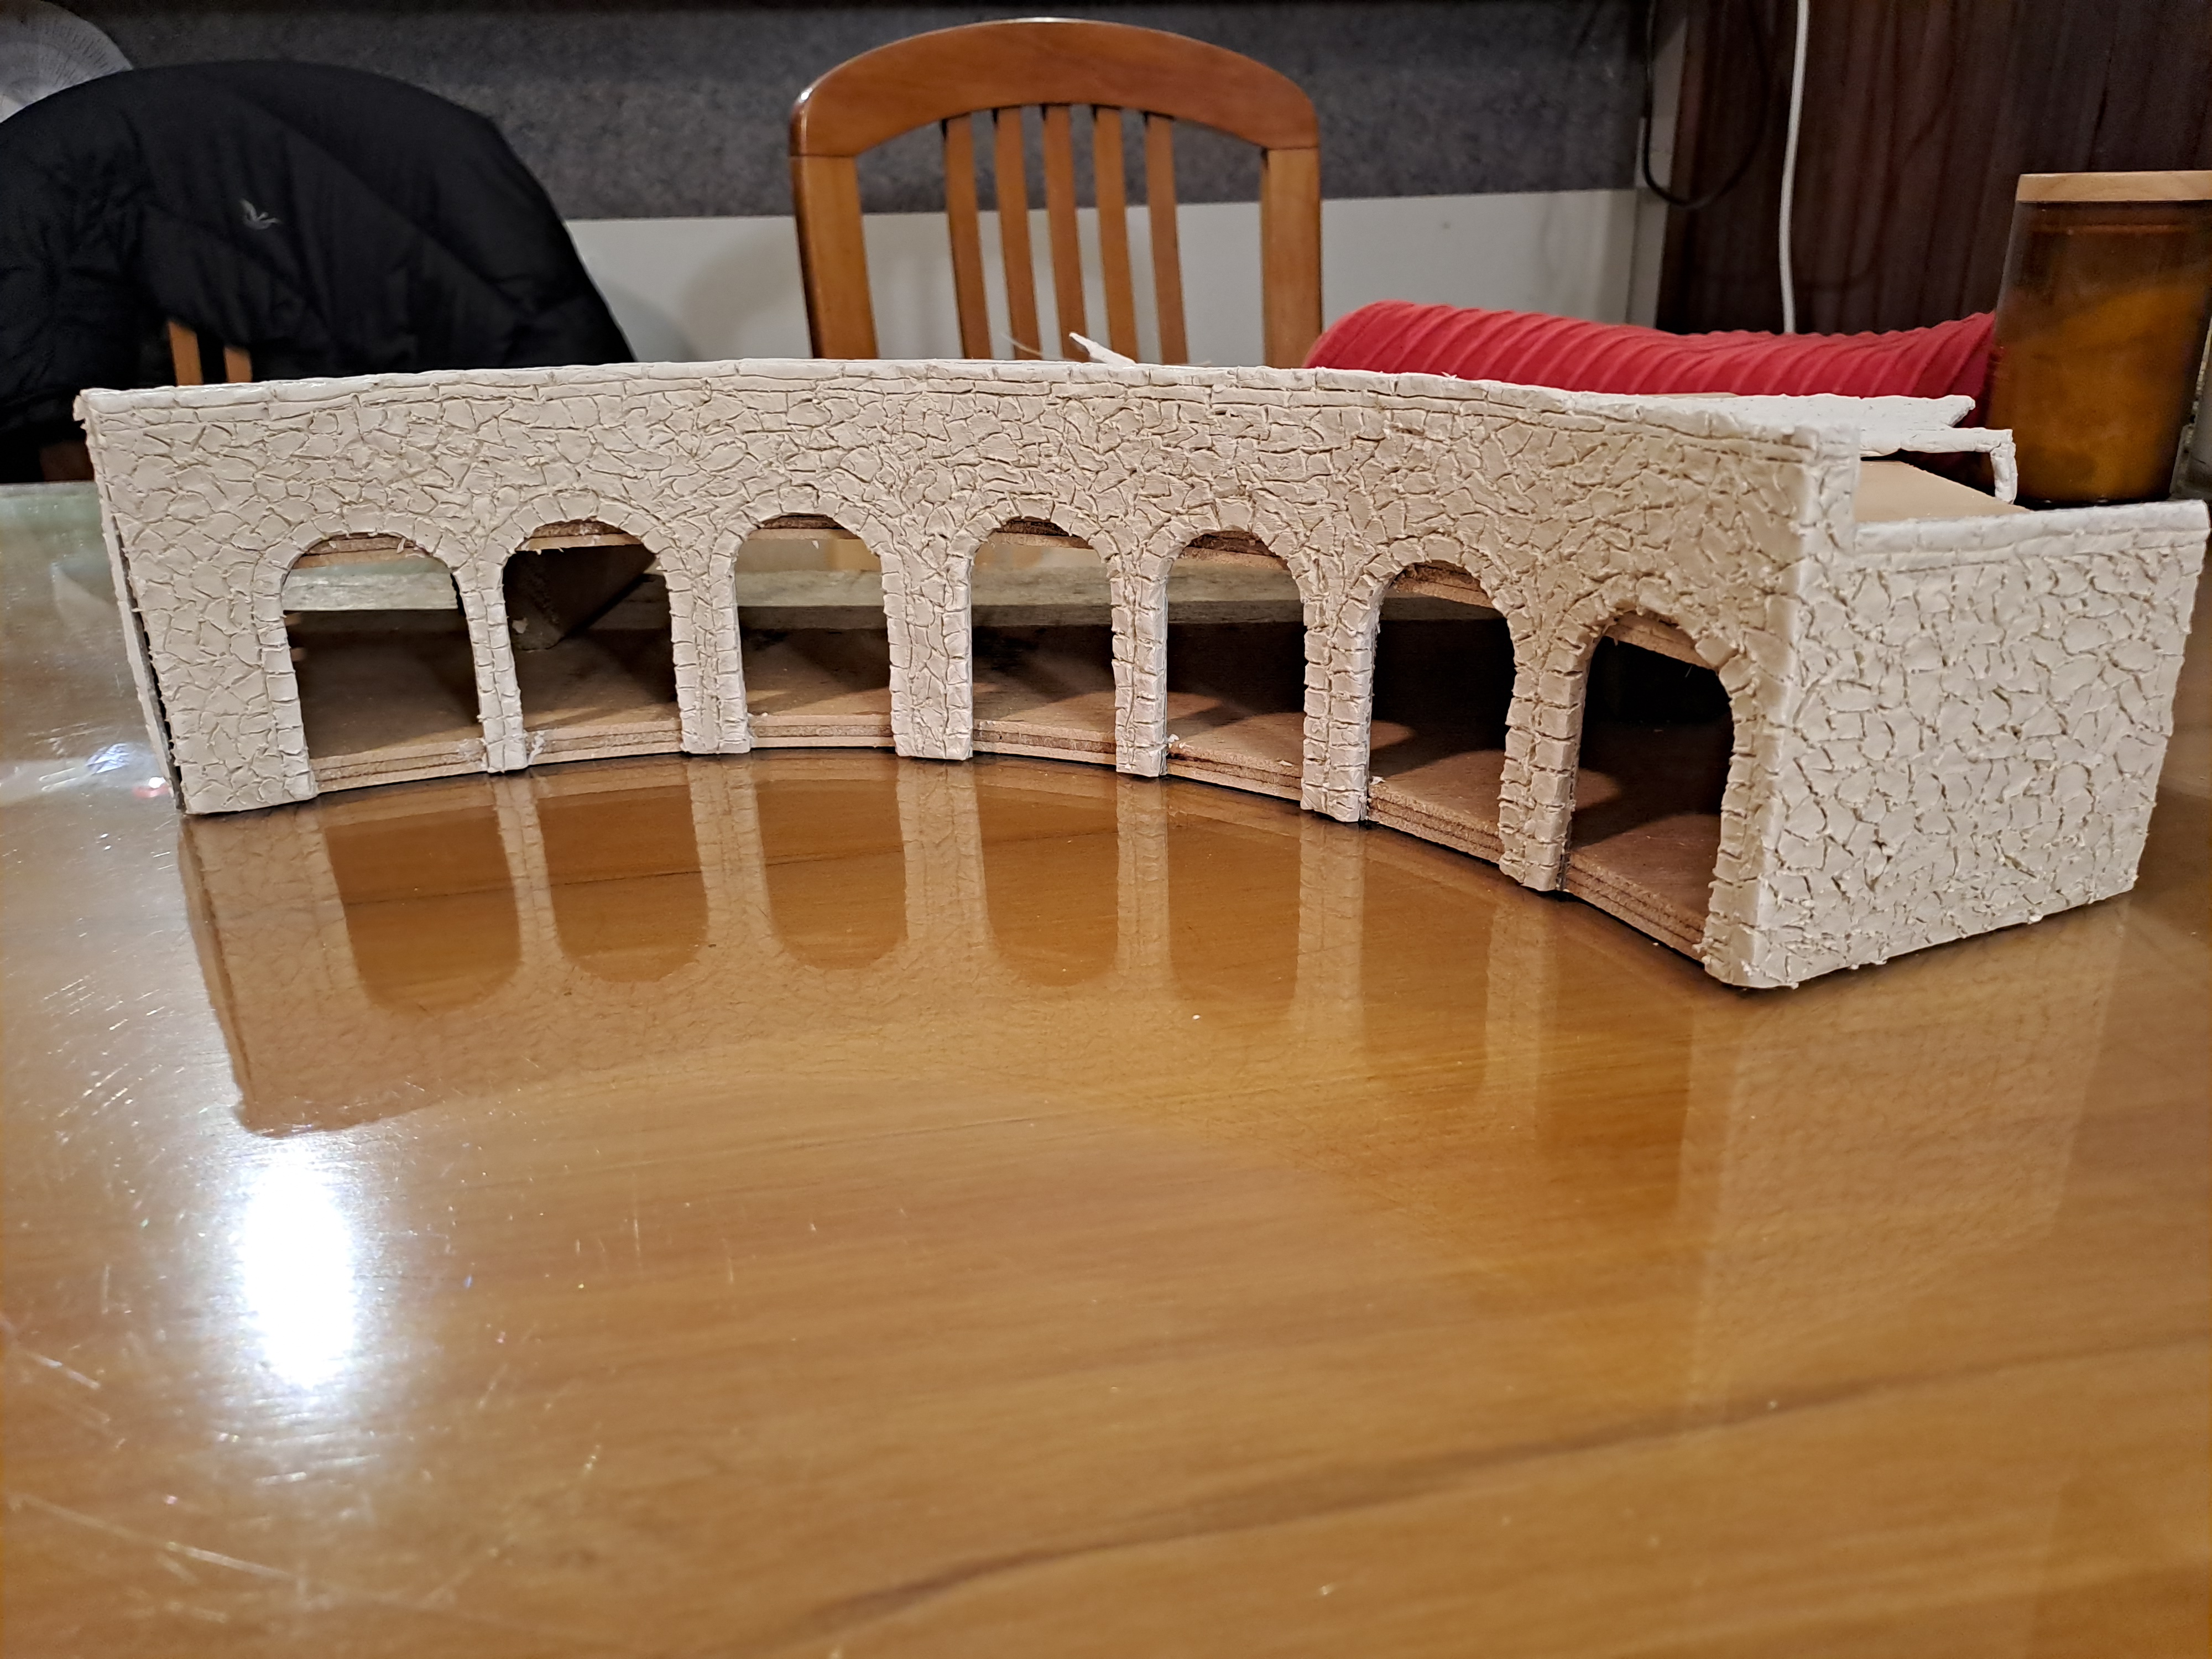
 After sorting out the jig and wall template for the front and far side of the roundhouse, I added the layer of clay and started carving. This went faster than I expected. I could have benefited from a smaller pick, as the one I had was quite long (from my workshop) making it a little harder to use with finesse. 

As it dried, I test-fitted some doors from my two-stall engine house from the old layout, which I used as a template for the engine doors. I would like to be able to have some of the doors be able to open and shut, but I'm not sure yet how I would make a resilient hinge that is also discrete. I will keep researching this and may initially just glue them open.

The prototype roundhouse has supporting columns in between each stall and on the edges of the roundhouse. At this stage I don't think I'll add these. Because they will be thin they will be more difficult to carve and additionally, it would likely draw more attention to my uneven stall spacing. 


Friday, 23 August 2024

Stone Roundhouse Scratchbuild Part 2


After building the side wall, I made a cardboard wall template for the front and far wall of the Roundhouse. Test fitting the template on the layout was important and I snapped a few photos below. Even the bare walls give a good impression of how the structure is going to change this whole scene. 

To make sure the clay dried at the correct angles for the front of the roundhouse I created a jig from plywood. I laid out a sheet of paper, took a rubbing with the pencil of the location of all the roundhouse tracks and then plotted the front wall of the roundhouse on the paper. The paper was then placed on some scrap plywood and cut out with a jigsaw. I cut two bits of plywood and spaced them out with scrap wood. Finally, I used Mod Podge to glue the cardboard wall template to the jig so that when the clay dries it will not pull the cardboard away from the jig. 


I'm looking forward to seeing this scene come to life as the project progresses.


The cardboard wall glued to the plywood jig