Friday, 29 November 2024

Modelling blurred aircraft propellers

When I model aircraft I typically always build them with their landing gear raised, as if in flight. The one drawback of this is that the propellers are always static in the display. When I take photos of the models I use a hair dryer to spin the props. This creates a great picture but doesn't look good displayed in a diorama. 

After searching the internet for different solutions, I found someone who had created some artwork of blurred propeller discs and made them available on a modelling forum. I got a good supply of these printed on clear acetate and then attached an exacto blade to a small drawing compass to cut them out accurately.

My son and I added one to his model of a RNZAF Corsair and the results look quite good. So we've decided to add them to a Mitsuibishi Zero he had completed previously. We're also completed a Hawker Typhoon model together with one of these discs as well. 

To display these models, I found artwork of relevant air combat scenes online. I usually had to clone out the main aircraft in the picture to be able to replace it with the model. I cut some 18mm boards slightly smaller than the picture and painted the back and edges black. Once this dried I glued the printed scene onto the board with Mod Podge and then trimmed the excess. Then it's a case of mounting the model to the board so it looks like it's part of the scene. These "photoboards" can hang on the wall like a picture. We've created two from the Pacific theatre, with the Corsair and the Zero. Even though they are different scenes they visually go together nicely. The Corsair flying into the scene on the left and the Zero flying out of it on the right create a nice parabola your eye naturally follows, drawing you through both dioramas. The Typhoon is sporting D-Day stripes and is displayed doing what it did best, diving in for a ground attack.



Friday, 22 November 2024

Stone Roundhouse Scratchbuild Part 5

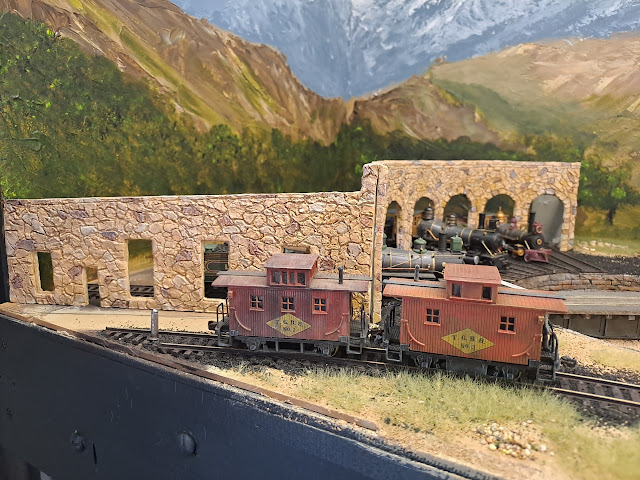
With the stone roundhouse off the jig, it was time to test it on the layout. I'm happy with the colouring and how it compliments the backdrop colouring, looking like the stone was quarried locally. Next steps will be to glue it in place and add ground cover to blend it into the scene.

In terms of the interior, I plan to make a wooden floor. The few prototype photos I've been able to find show early roundhouses either had stone, dirt or wood floors. After reading about others experience with making service pits, I've decided not to add these. Though, one or two could be added at a later date when I spend more time on the interior. 

After gluing it down I will need to scratch build some doors and a temporary roof.


Friday, 15 November 2024

Static grass Part 1

This post shows the progress of adding static grass to the yard and town modules. I am using a mixture of Noch, Silfor and Woodland Scenics static grass. My static grass applicator was from AliExpress, and works really well. I haven't tested any of the more expensive models from Woodland Scenics and Noch, but I'm not sure that their results would necessarily justify the increased price. 

I particularly like the results of the patchy grass around the team and stockyard tracks, which are buried in the ground. The tufts don't interfer with the rolling stock and adds to the overall look of the scene. 


Friday, 8 November 2024

Stone Roundhouse Scratchbuild Part 4


Just a short update on the Stone Roundhouse project. I used the same 'leopard spot' technique that I use for painting rock casting to paint the roundhouse stones. I painted individual stones an assortment of earth colours and then blended them together with a earth tan wash. On a test section I first tried a raw sienna wash, but this turned out too yellow. The tan gave more of the colour I was looking for. I was sure to check out the colouring under the layout lighting at several stages to make sure that it would end up looking right on the layout.

After the paints were completely dry, I light dry brush with white brought out some highlights and dulled down any bits that seemed too bright. The next step it to remove it from the jig and install it on the layout.