Friday, 21 March 2025

Decommissioning the original Thoroughfare Gap Railroad

I started building the original Thoroughfare Gap Railroad in 2008. It was a traditional tabletop layout, and the first I truly built myself. The track layout was inspired by Ron Hatch's Fulton County Narrow Gauge layout (HOn3) but had to be adapted for the HO scale. 

The times of this layout were really special. I experimented with different scenery techniques and found many things that worked and many that didn't. The biggest drawback I found in the end was the steep grades, which added plenty of scenic drama but limited the size of the trains I could run. When I expanded the layout, I enjoyed 'unfolding' the track plan and stretching it out along narrow modules with more scenery and less trackage. 

In many ways, I said 'goodbye' to this layout when we moved it from Gore to Timaru. I knew its days were numbered and it had served its purpose. I had a two-year reprieve while it served as the temporary terminus for the new modular layout. Even so, it was hard to let go of. I decided to salvage what I could of the bridges, all the points/switches and anything that could be removed easily. The rest was loaded on a trailer and taken to the local refuse station. Decommissioning a layout comes with a multitude of different feelings, sadness, regret, guilt, excitement and hope. Decision-making in the midst of this can be hard and I changed my position on things many times before I actually started pulling it apart. 

I'm sure if you've ever decommissioned a layout of your own or a family member's you may have encountered something similar. 


Looking bare again without buildings and people. 

I salvaged the bridges and wood structures. Perhaps I'll use part of them in the future. 

The remnant of the layout sitting at the bottom of the local refuse transfer station 


Friday, 14 March 2025

Moving the modules

So last year our time in Timaru came to an end. This is no surprise as it was only ever for the two years of my ministry training. The last few months saw the layout face the test it was designed for: dismantling, transporting and reestablishing in our new home in Christchurch (more about that another time). 

The dismantling part was easy. The lighting was unplugged, and the modules were uncoupled by removing the two bolts that connected each module together, which also undid the electrical connection between them. The temporary legs are also unbolted. They will be replaced with more substantial wooden legs.

The figures on the layout are glued in place with Mod Podge but the buildings were removed and packed in boxes. 

Each module was pleasantly light and easily manoeuvred by two people. I cut some plywood to cover the open sides. These cut pieces will get turned into the framing for new modules.

The original piece of the layout, which I built in Gore, was sadly decommissioned. It seems fitting to post about this separately later. 

The ravine module was the heaviest (unsurprisingly). Even so, two people could move without much effort.

The buildings came off, and were packed away separately, but the trees
and many of the figured stayed glued in place for the journey.

Ready for boxing...

Three of the modules are all encased in plywood. This made them very easy to transport.


Friday, 13 December 2024

Scenery in the Ravine Part 2

Somehow I missed taking some progress shots on this module. But here is where it's landed for now. I completed the static grassing and added many of the conifer trees from the old layout. I also added a couple of my redwood trees on the edge of the module as the next module to be built will introduce the redwood forest. 

The river is to have gravel and water added, and I plan to add some light foliage to the nooks and crannies on the gorge cliffs. Of course, the steel viaduct is still to be completed, but for now, the plywood bridge has been painted brown as a stand-in.  


Sunday, 8 December 2024

Stone Roundhouse Scratchbuild Part 6


This may be the last update for the roundhouse for a while, I'm pretty happy with where it ended up. 

I added some wooden flooring, scribed and weathered balsa. In time I'll rafters, framing and vertical roof supports and I hope to detail the interior. But for now, it's ok. I scratchbuilt doors using pre-scribed balsa sheet and added framing using cardstock. I made a card template and mass-produced these over several evenings. For now, they are just glued in place.

I also took a photo of the exterior of the roundhouse and duplicated it in Photoshop to make a continuous print that could be used as a stand-in for a back wall. Again, it is not a final solution, but more like a temporary stage prop to help the illusion. 

Lastly,  a temporary roof was made with cardstock and copier paper layered on to represent tar paper. 

The layout is being prepared for its ultimate test, being able to move. I'm very pleased to have the roundhouse project to this point prior to moving as it feels like a natural stopping point for this module. 


Friday, 29 November 2024

Modelling blurred aircraft propellers

When I model aircraft I typically always build them with their landing gear raised, as if in flight. The one drawback of this is that the propellers are always static in the display. When I take photos of the models I use a hair dryer to spin the props. This creates a great picture but doesn't look good displayed in a diorama. 

After searching the internet for different solutions, I found someone who had created some artwork of blurred propeller discs and made them available on a modelling forum. I got a good supply of these printed on clear acetate and then attached an exacto blade to a small drawing compass to cut them out accurately.

My son and I added one to his model of a RNZAF Corsair and the results look quite good. So we've decided to add them to a Mitsuibishi Zero he had completed previously. We're also completed a Hawker Typhoon model together with one of these discs as well. 

To display these models, I found artwork of relevant air combat scenes online. I usually had to clone out the main aircraft in the picture to be able to replace it with the model. I cut some 18mm boards slightly smaller than the picture and painted the back and edges black. Once this dried I glued the printed scene onto the board with Mod Podge and then trimmed the excess. Then it's a case of mounting the model to the board so it looks like it's part of the scene. These "photoboards" can hang on the wall like a picture. We've created two from the Pacific theatre, with the Corsair and the Zero. Even though they are different scenes they visually go together nicely. The Corsair flying into the scene on the left and the Zero flying out of it on the right create a nice parabola your eye naturally follows, drawing you through both dioramas. The Typhoon is sporting D-Day stripes and is displayed doing what it did best, diving in for a ground attack.


Friday, 22 November 2024

Stone Roundhouse Scratchbuild Part 5

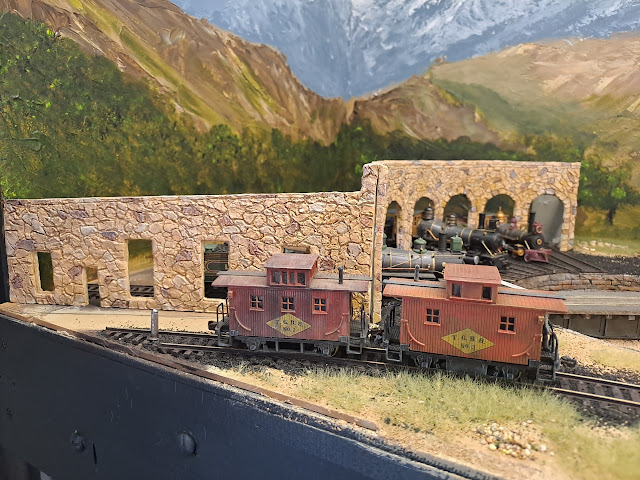
With the stone roundhouse off the jig, it was time to test it on the layout. I'm happy with the colouring and how it compliments the backdrop colouring, looking like the stone was quarried locally. Next steps will be to glue it in place and add ground cover to blend it into the scene.

In terms of the interior, I plan to make a wooden floor. The few prototype photos I've been able to find show early roundhouses either had stone, dirt or wood floors. After reading about others experience with making service pits, I've decided not to add these. Though, one or two could be added at a later date when I spend more time on the interior. 

After gluing it down I will need to scratch build some doors and a temporary roof.


Friday, 15 November 2024

Static grass Part 1

This post shows the progress of adding static grass to the yard and town modules. I am using a mixture of Noch, Silfor and Woodland Scenics static grass. My static grass applicator was from AliExpress, and works really well. I haven't tested any of the more expensive models from Woodland Scenics and Noch, but I'm not sure that their results would necessarily justify the increased price. 

I particularly like the results of the patchy grass around the team and stockyard tracks, which are buried in the ground. The tufts don't interfer with the rolling stock and adds to the overall look of the scene.